Notice: Our Telephone services will be temporarily unavailable due to maintenance from 12:00 PM to 2:00 PM
We apologize for any inconvenience.
We apologize for any inconvenience.

1
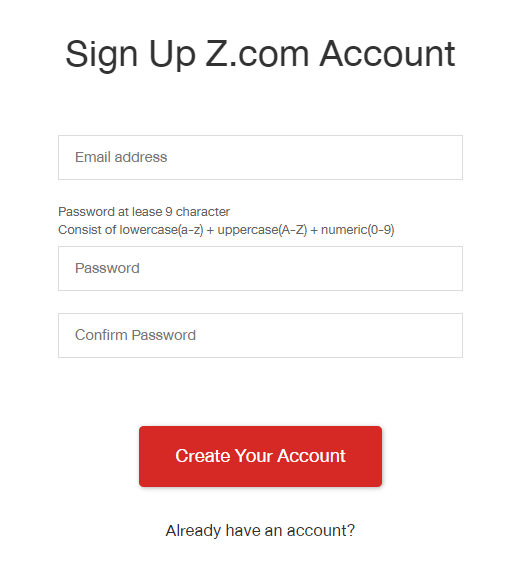
Register for Z.com account
(Skip this step if you already have a z.com accout)
1.1
Insert your email address and password for the login process on your new account
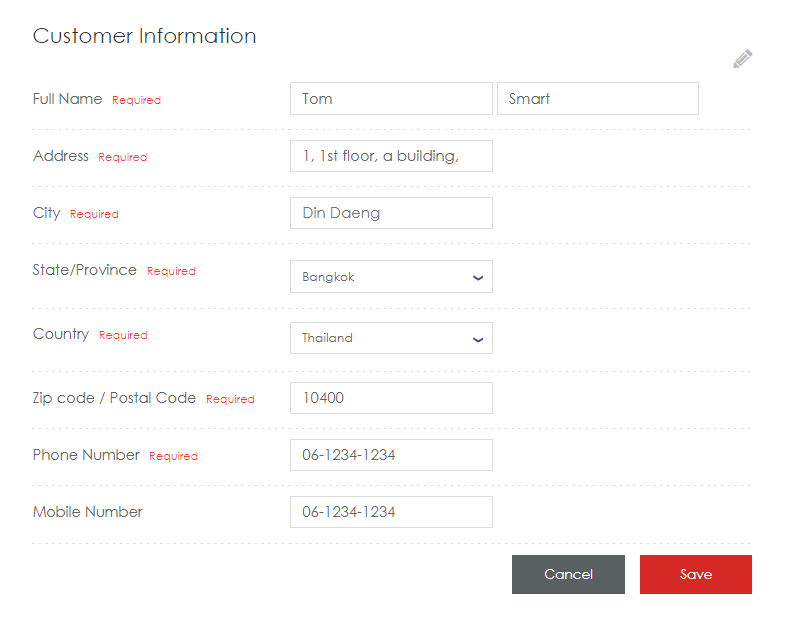
1.2
Fill in your personal information for your new account and click save.
2
Top up credit of register credit card
**Necessary for customer to purchase any service on our platform
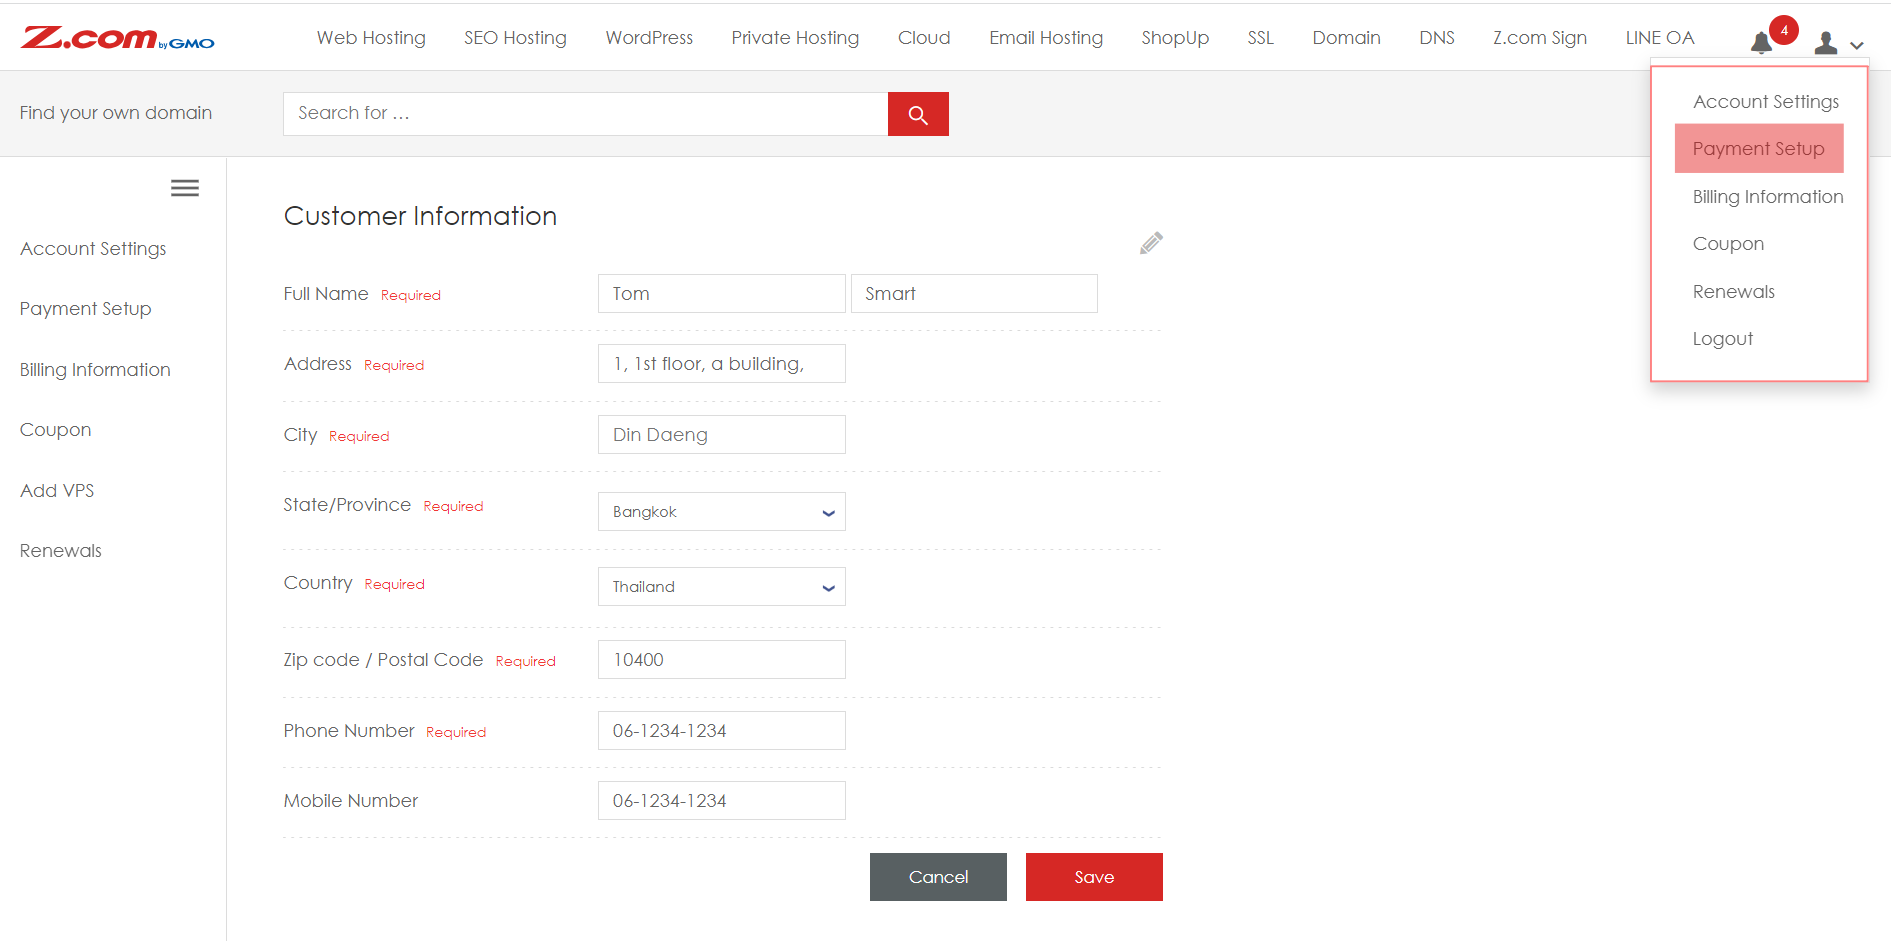
2.1
After login into the MyZ.com control panel, go to the "Payment Setup" in the profile menu
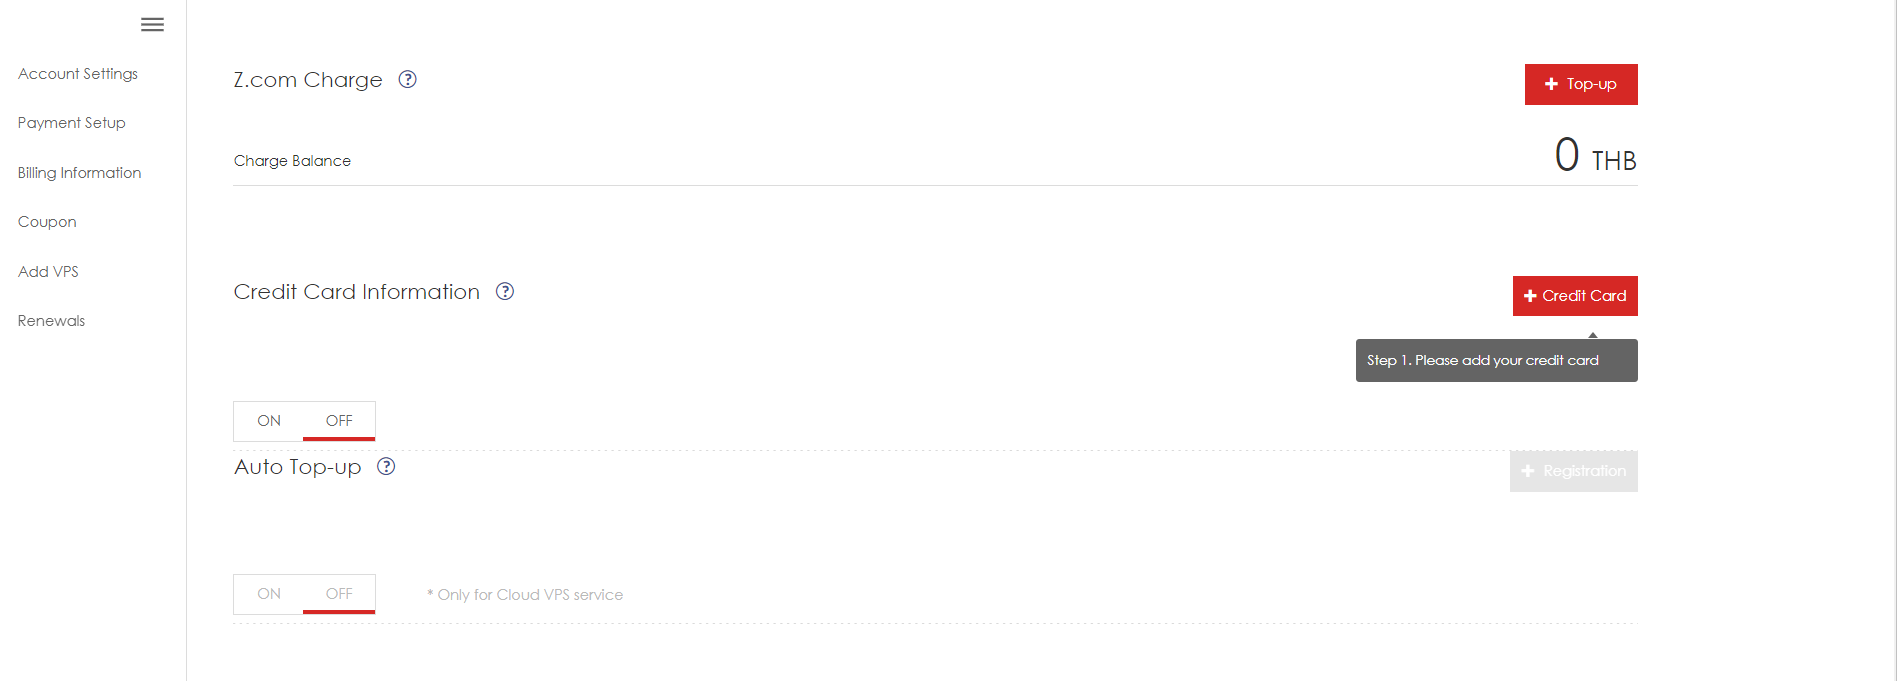
2.2
You can choose to top up credit with the following methods or register credit card for auto top up
1. Credit card
2. Bank Transfer
3. Pay at store (Big, Tesco, Lotus, etc)
**Minimum amount of top up credit is 100THB to start using Z.com Cloud service in hourly basis.
3
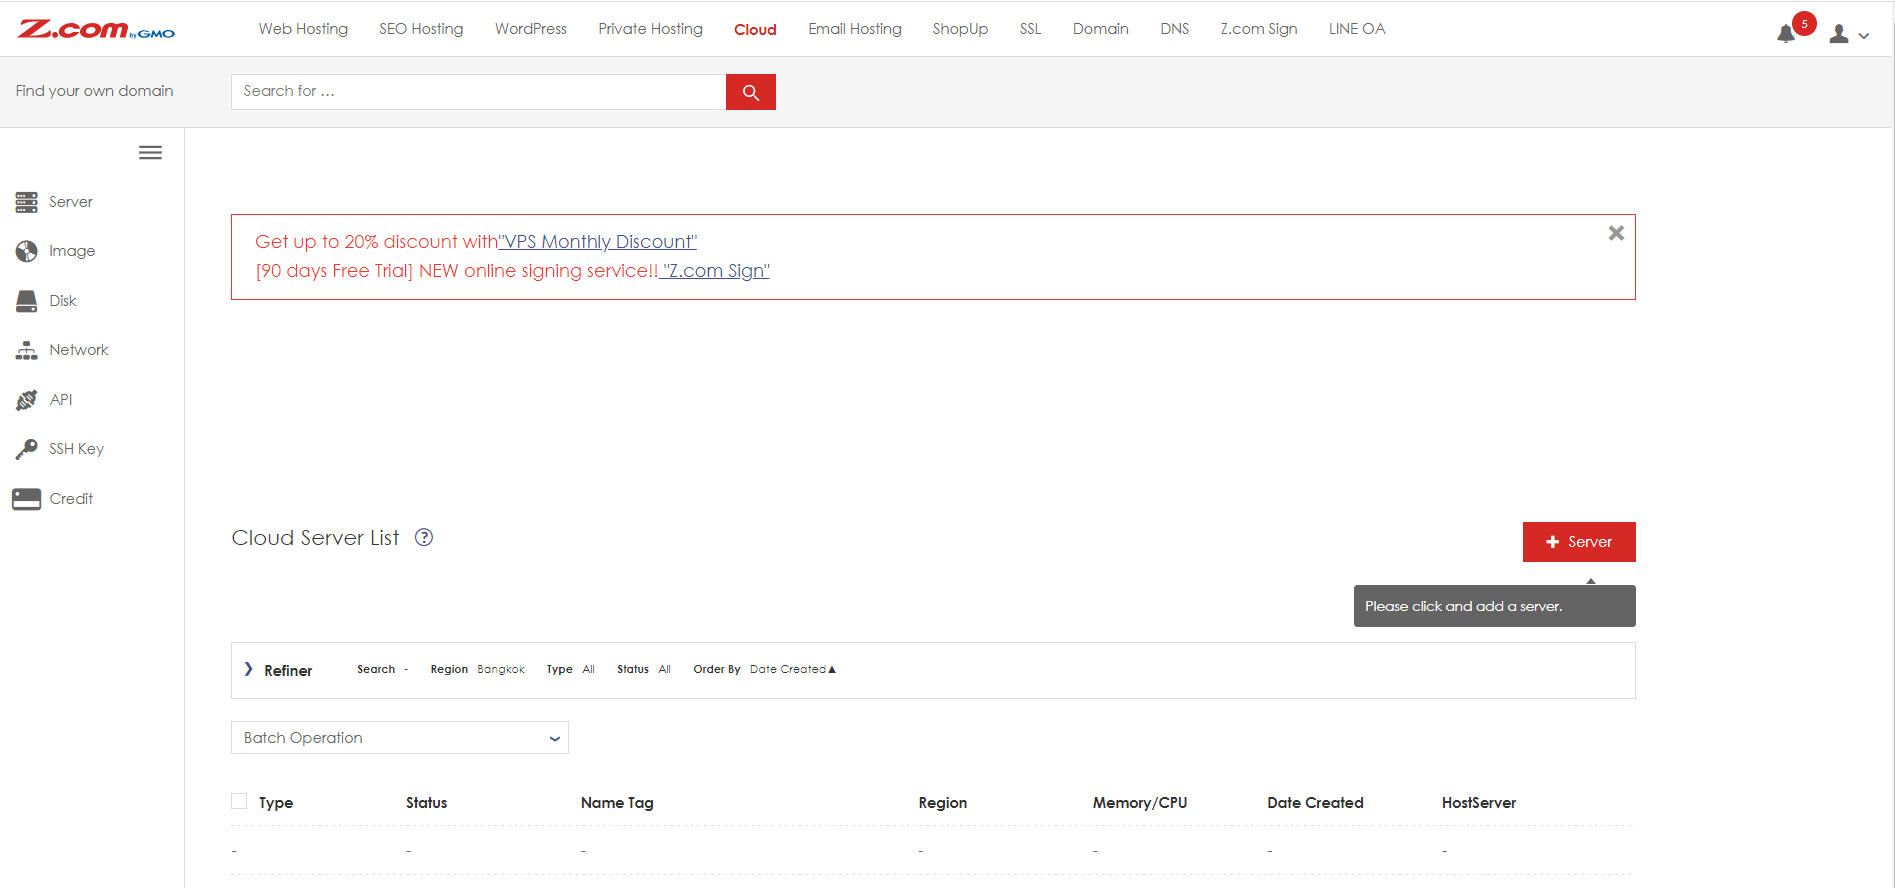
Create new server
3.1
Go to the main product page for "Cloud" and click on the "+ Server"
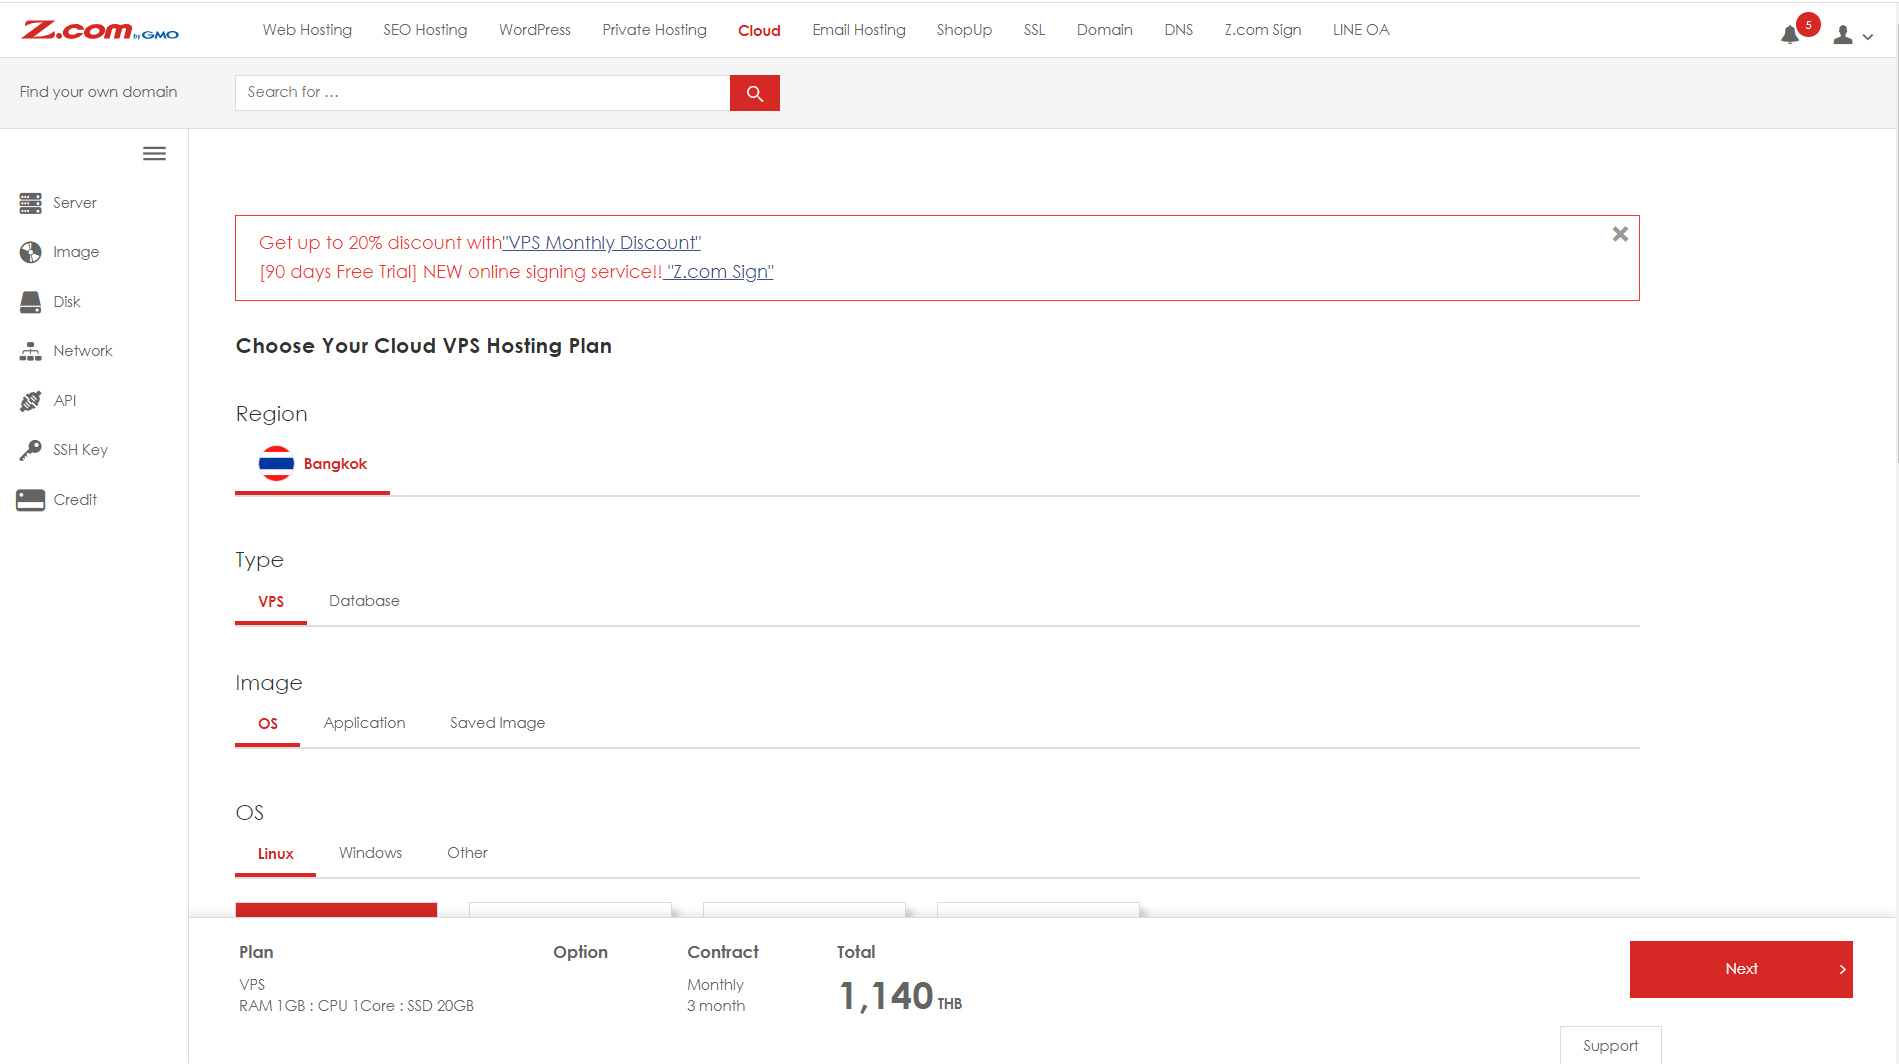
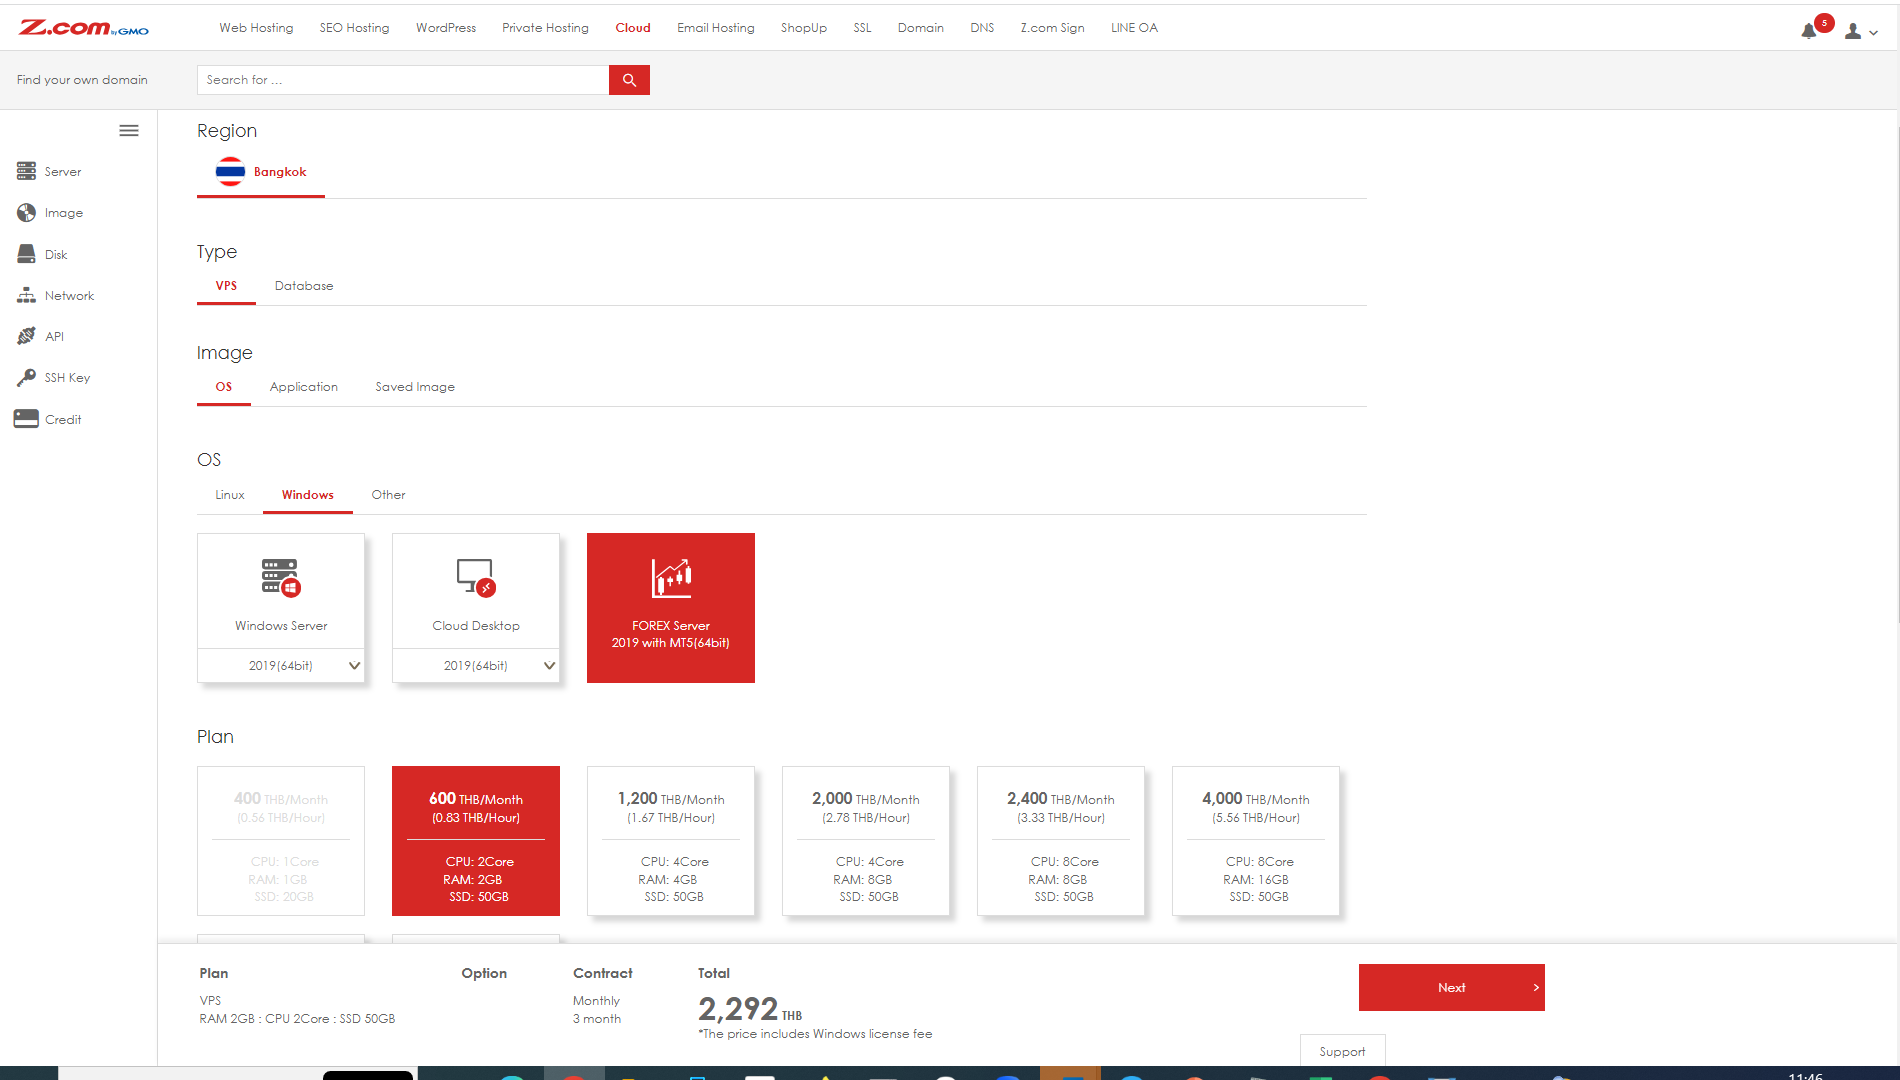
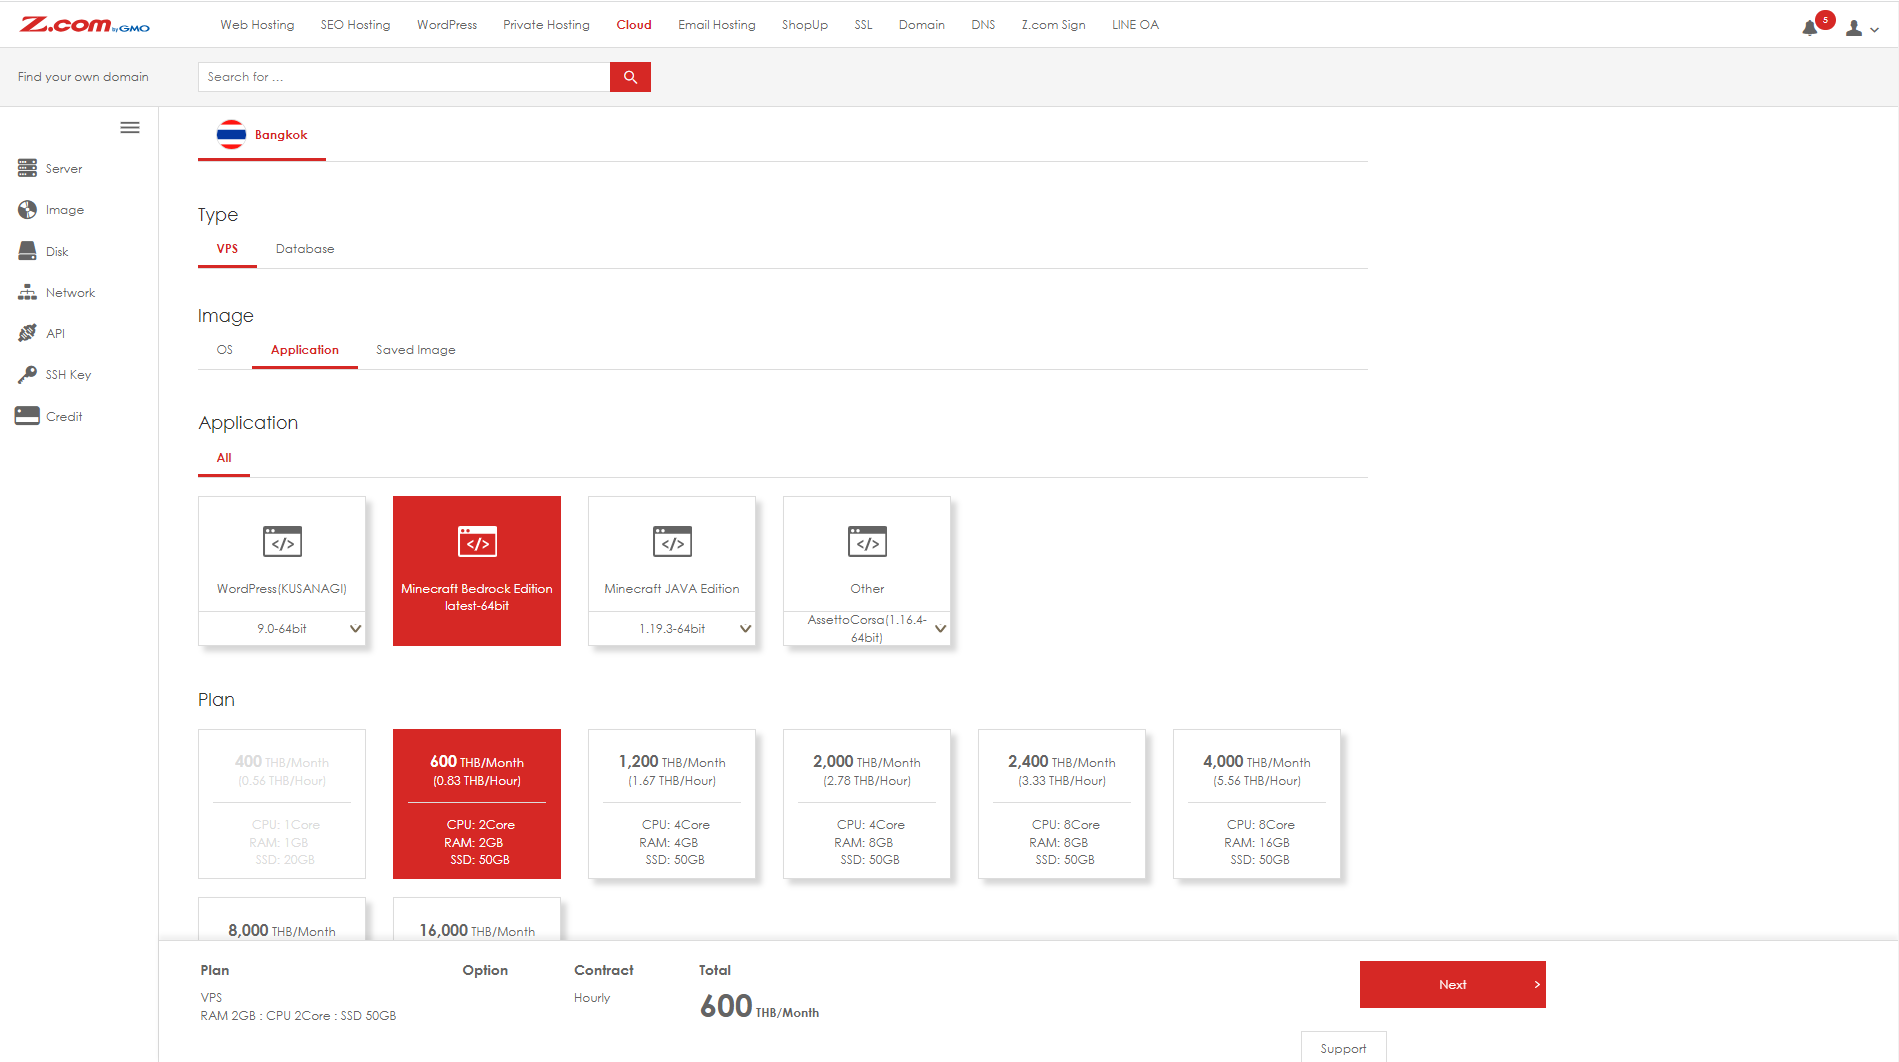
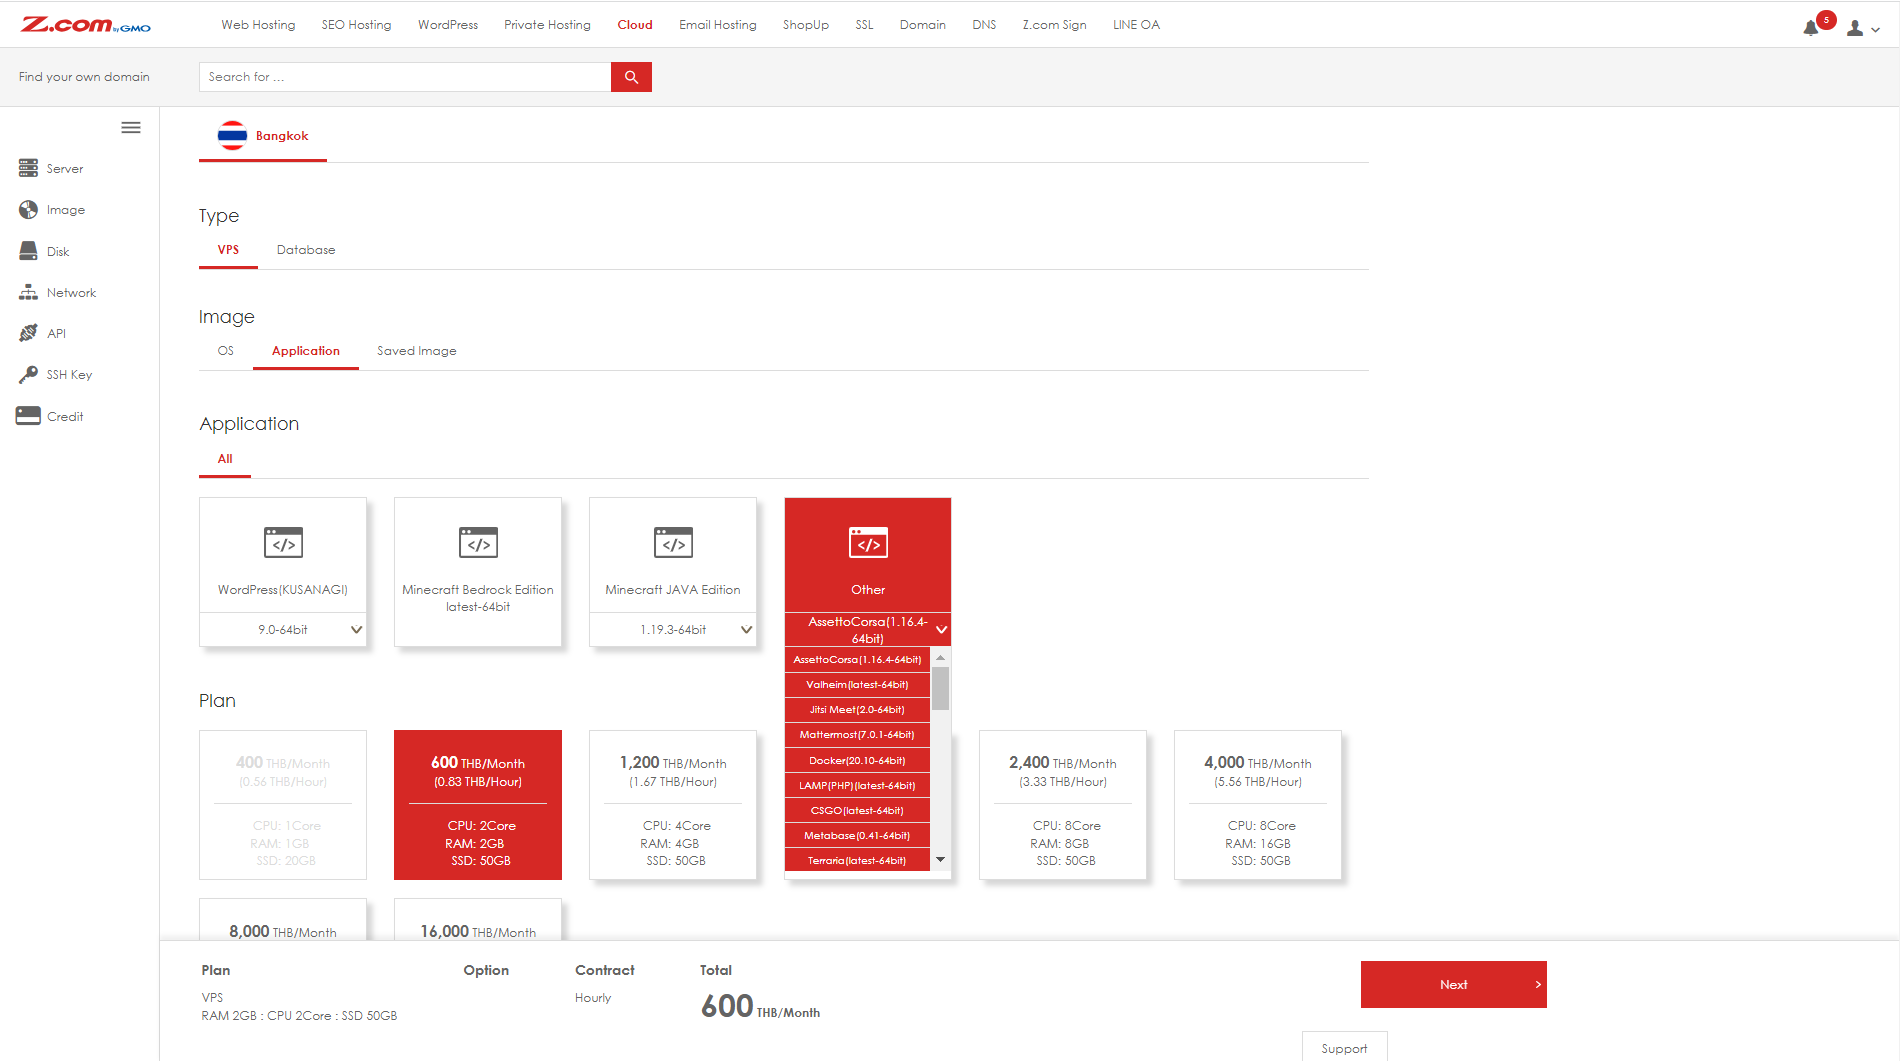
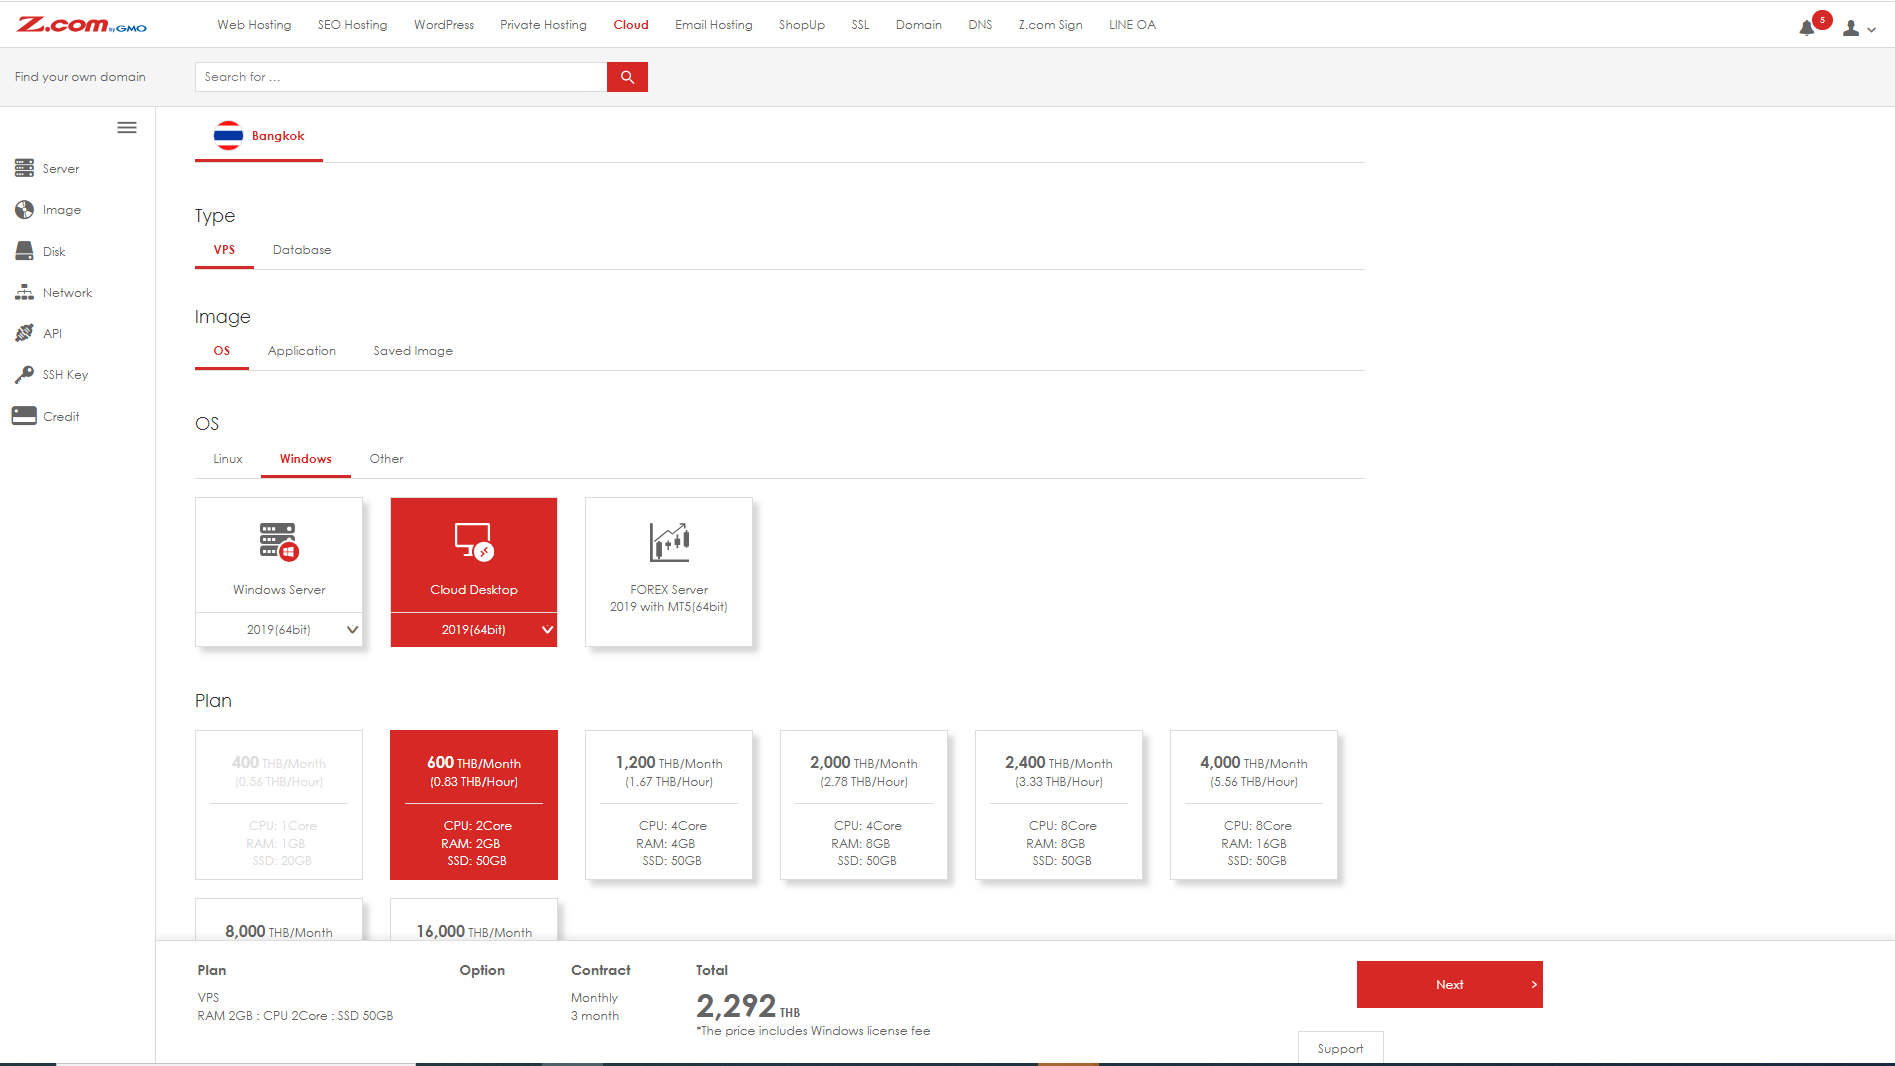
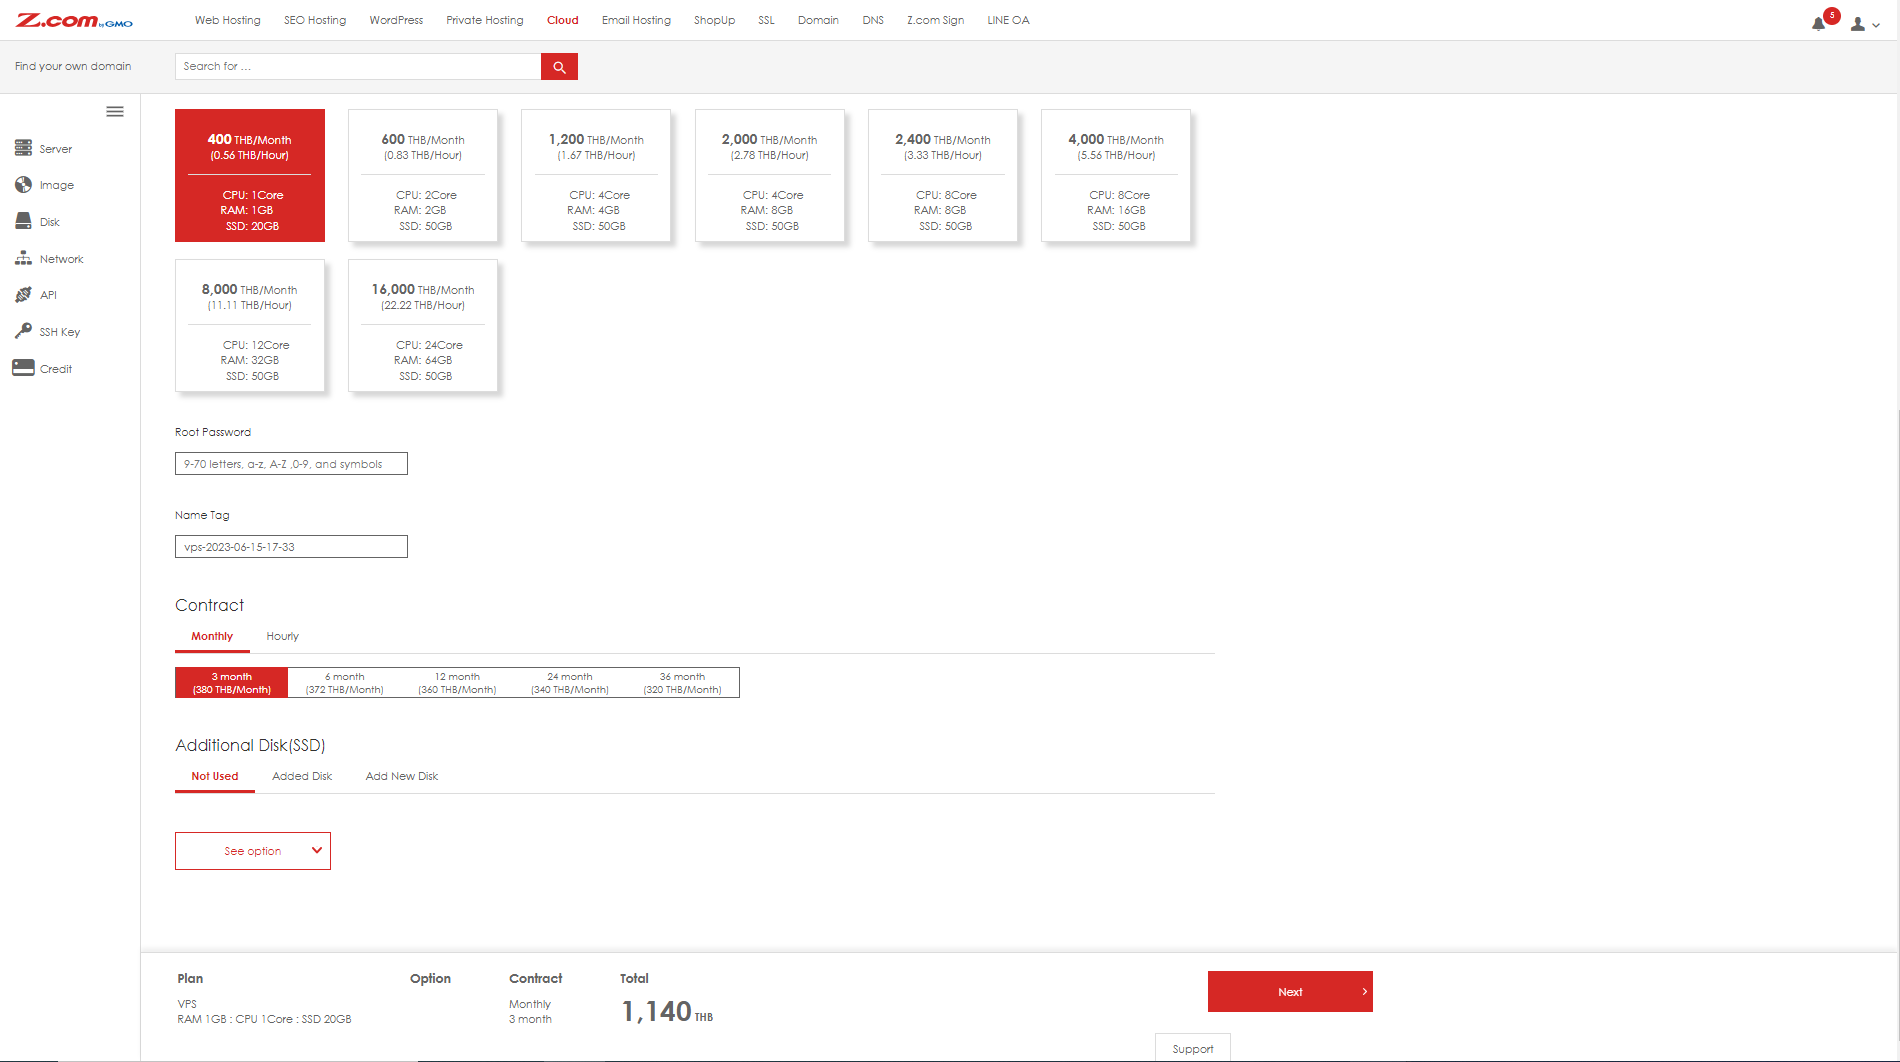
3.2
Choose "VPS" under Type section and choose "OS" or "Application" under Image section depends on your preference
1. "OS" is for pure VPS server with only OS pre-installed on the VM
2. "Aplication" is for VPS server with pre-installed application on the VM
3. "Saved Image" is for customer to deploy new VM with the pre-saved VM image in the account
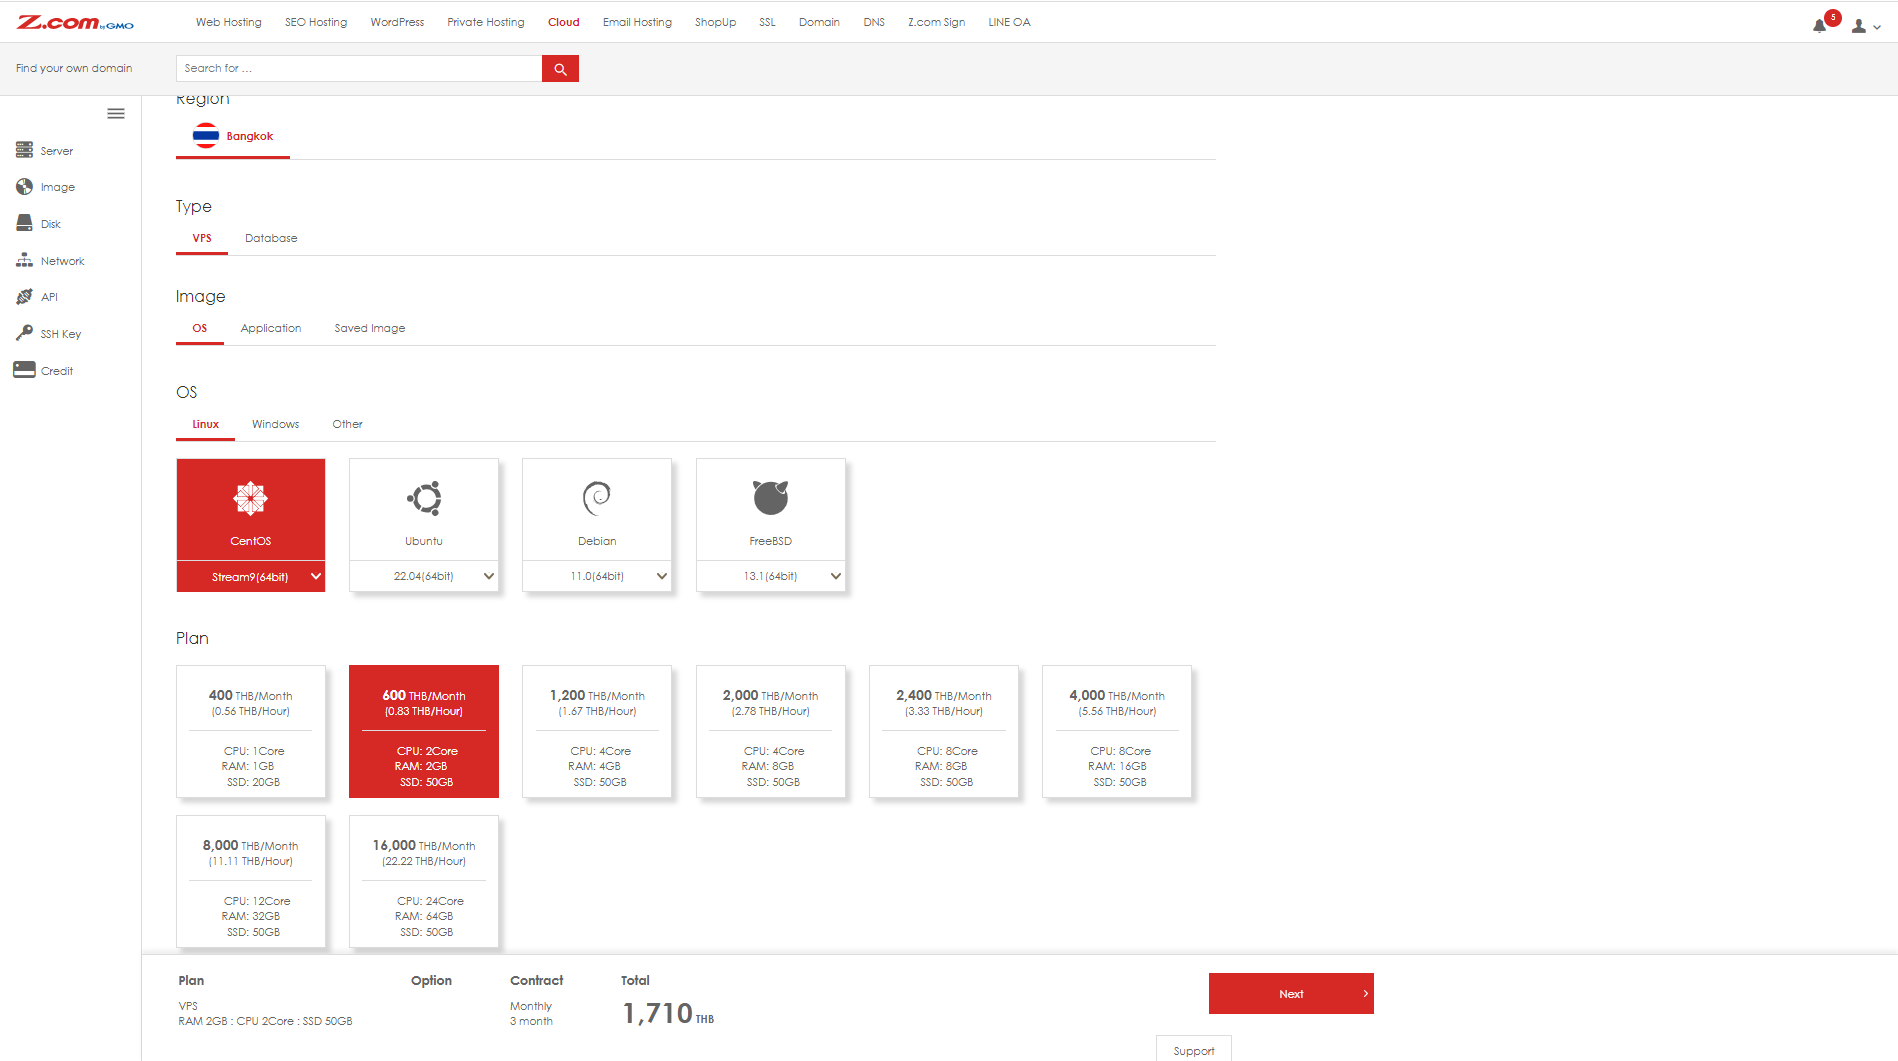
Select the server plan on your preference under the plan section
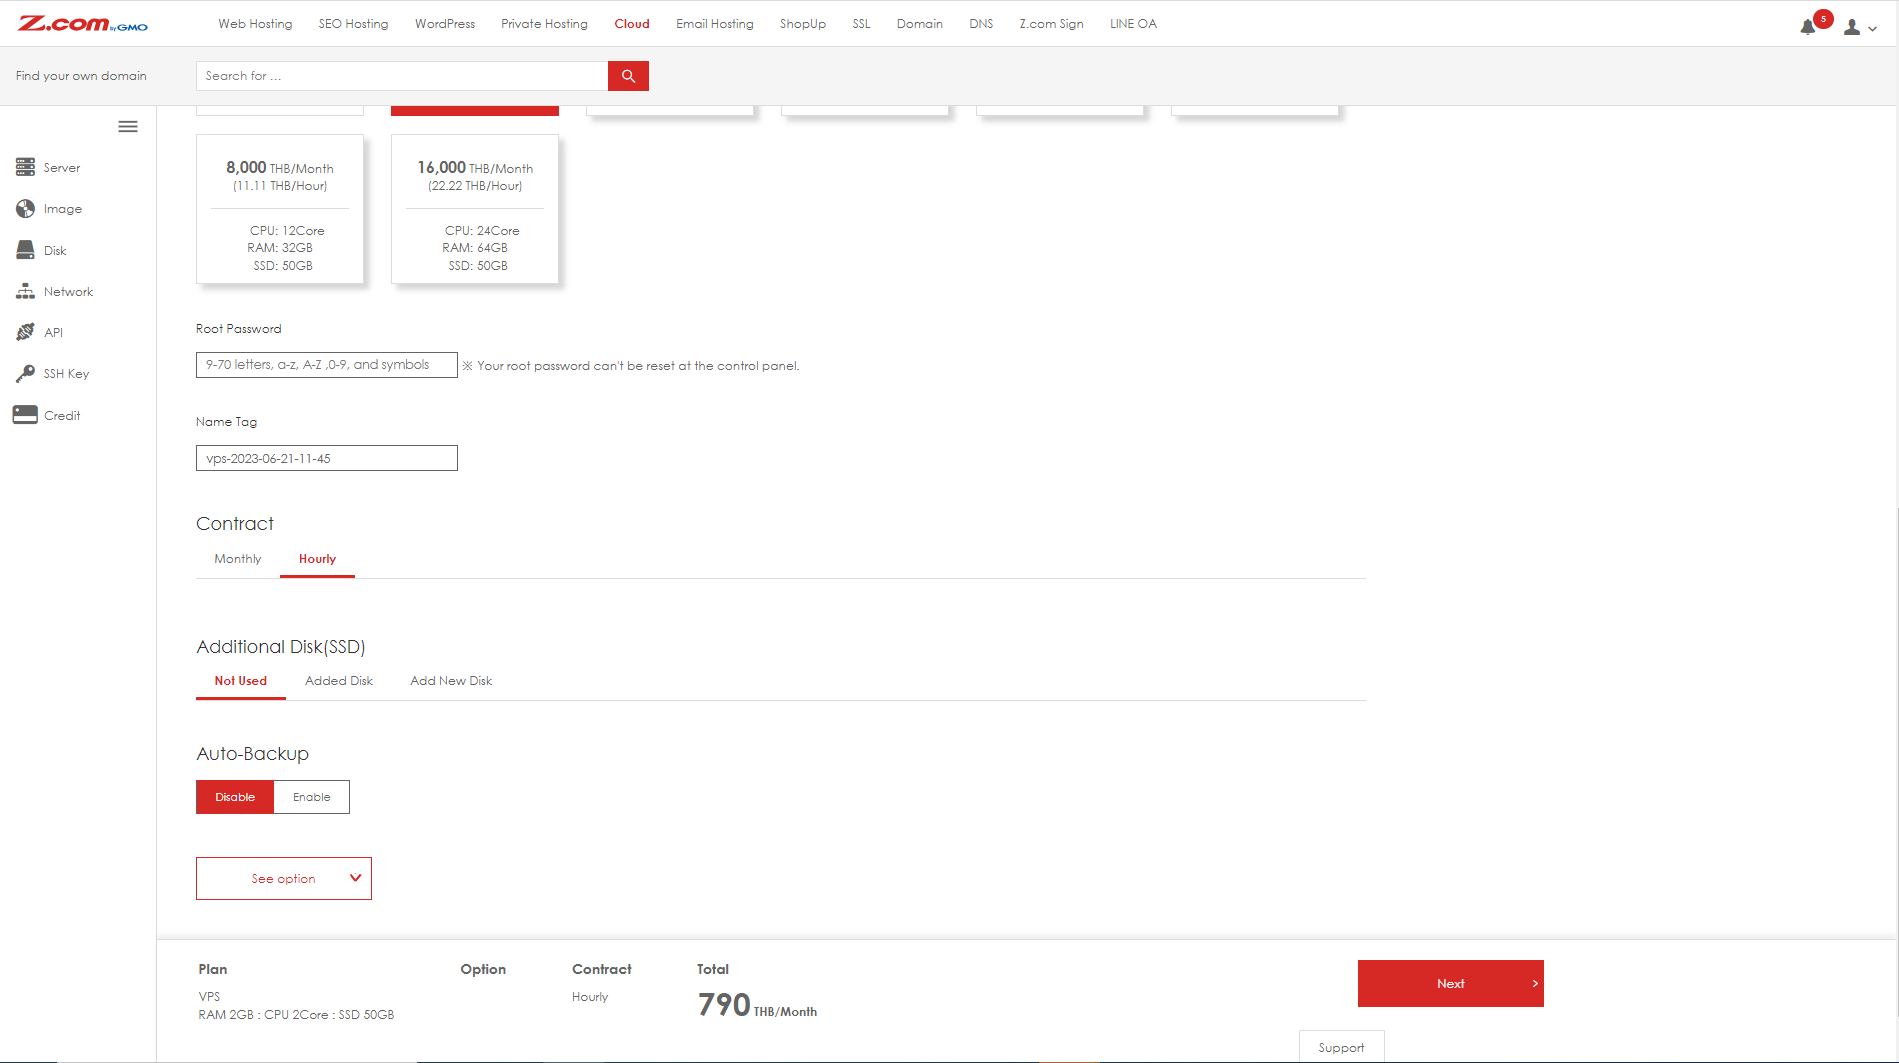
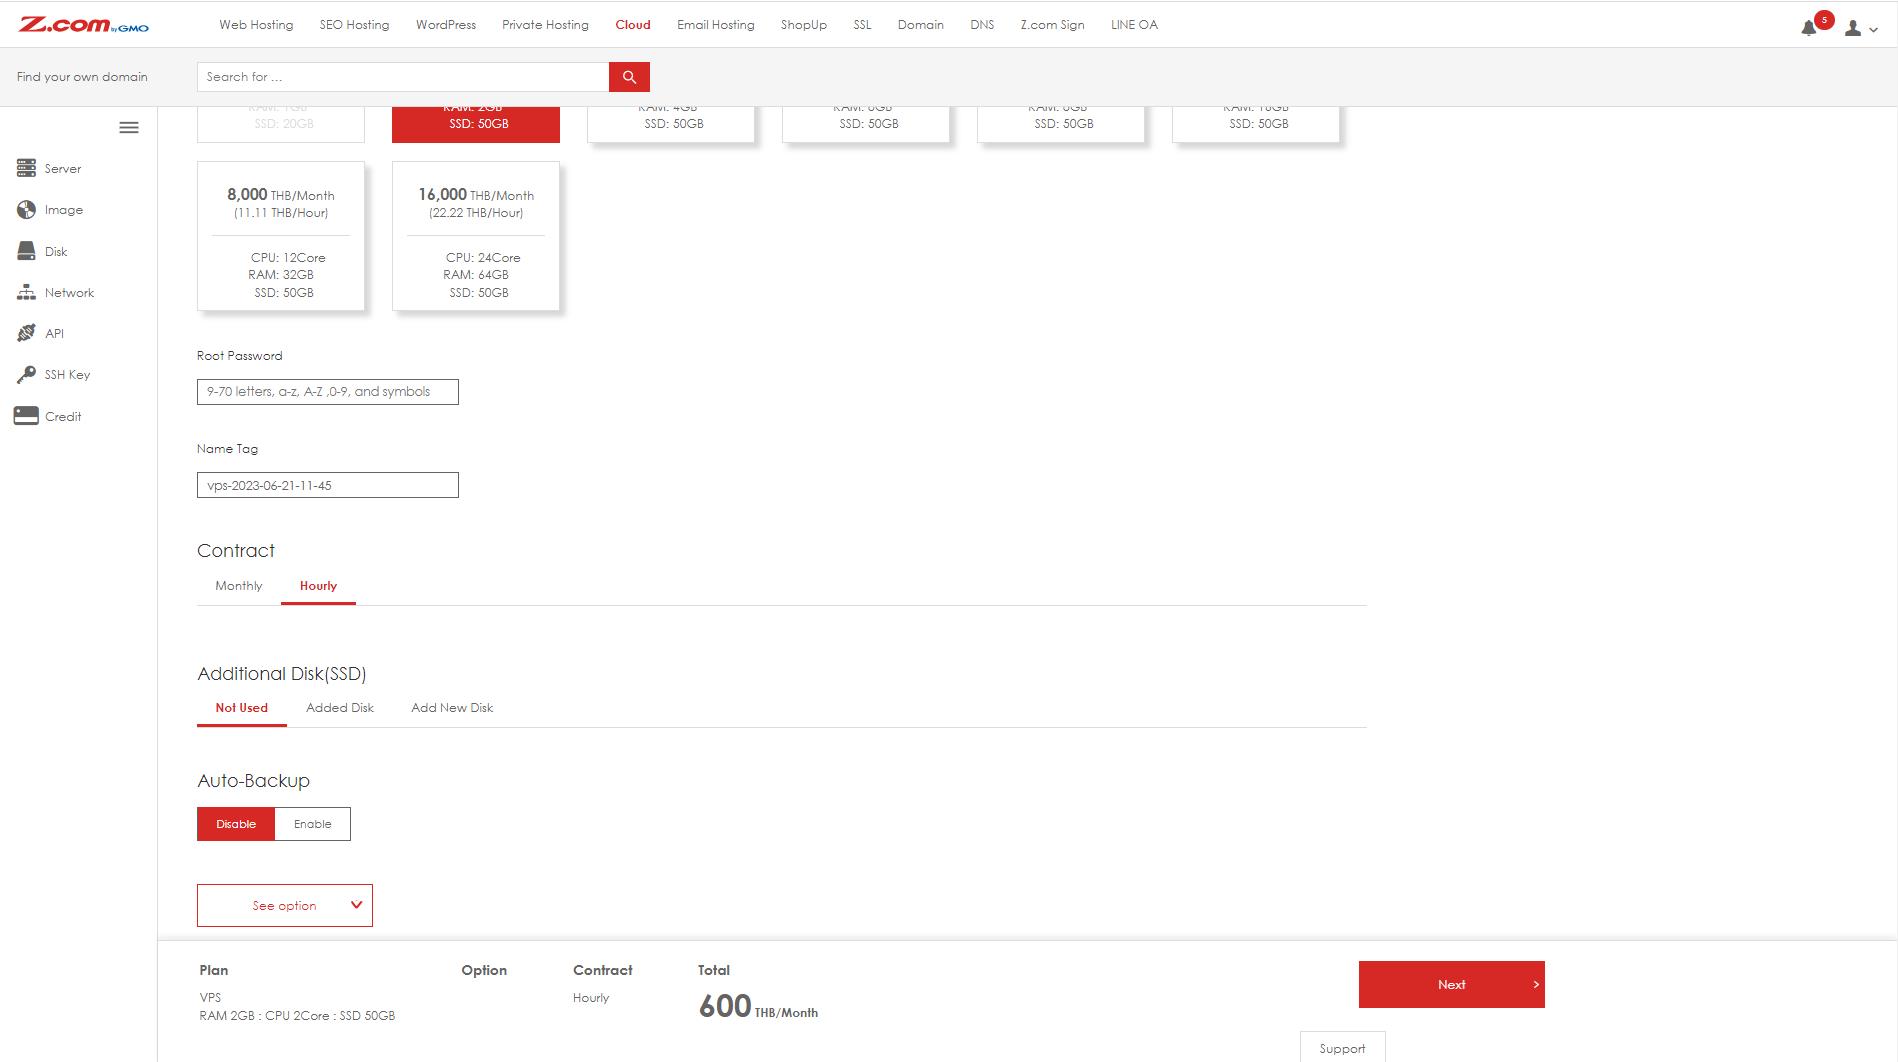
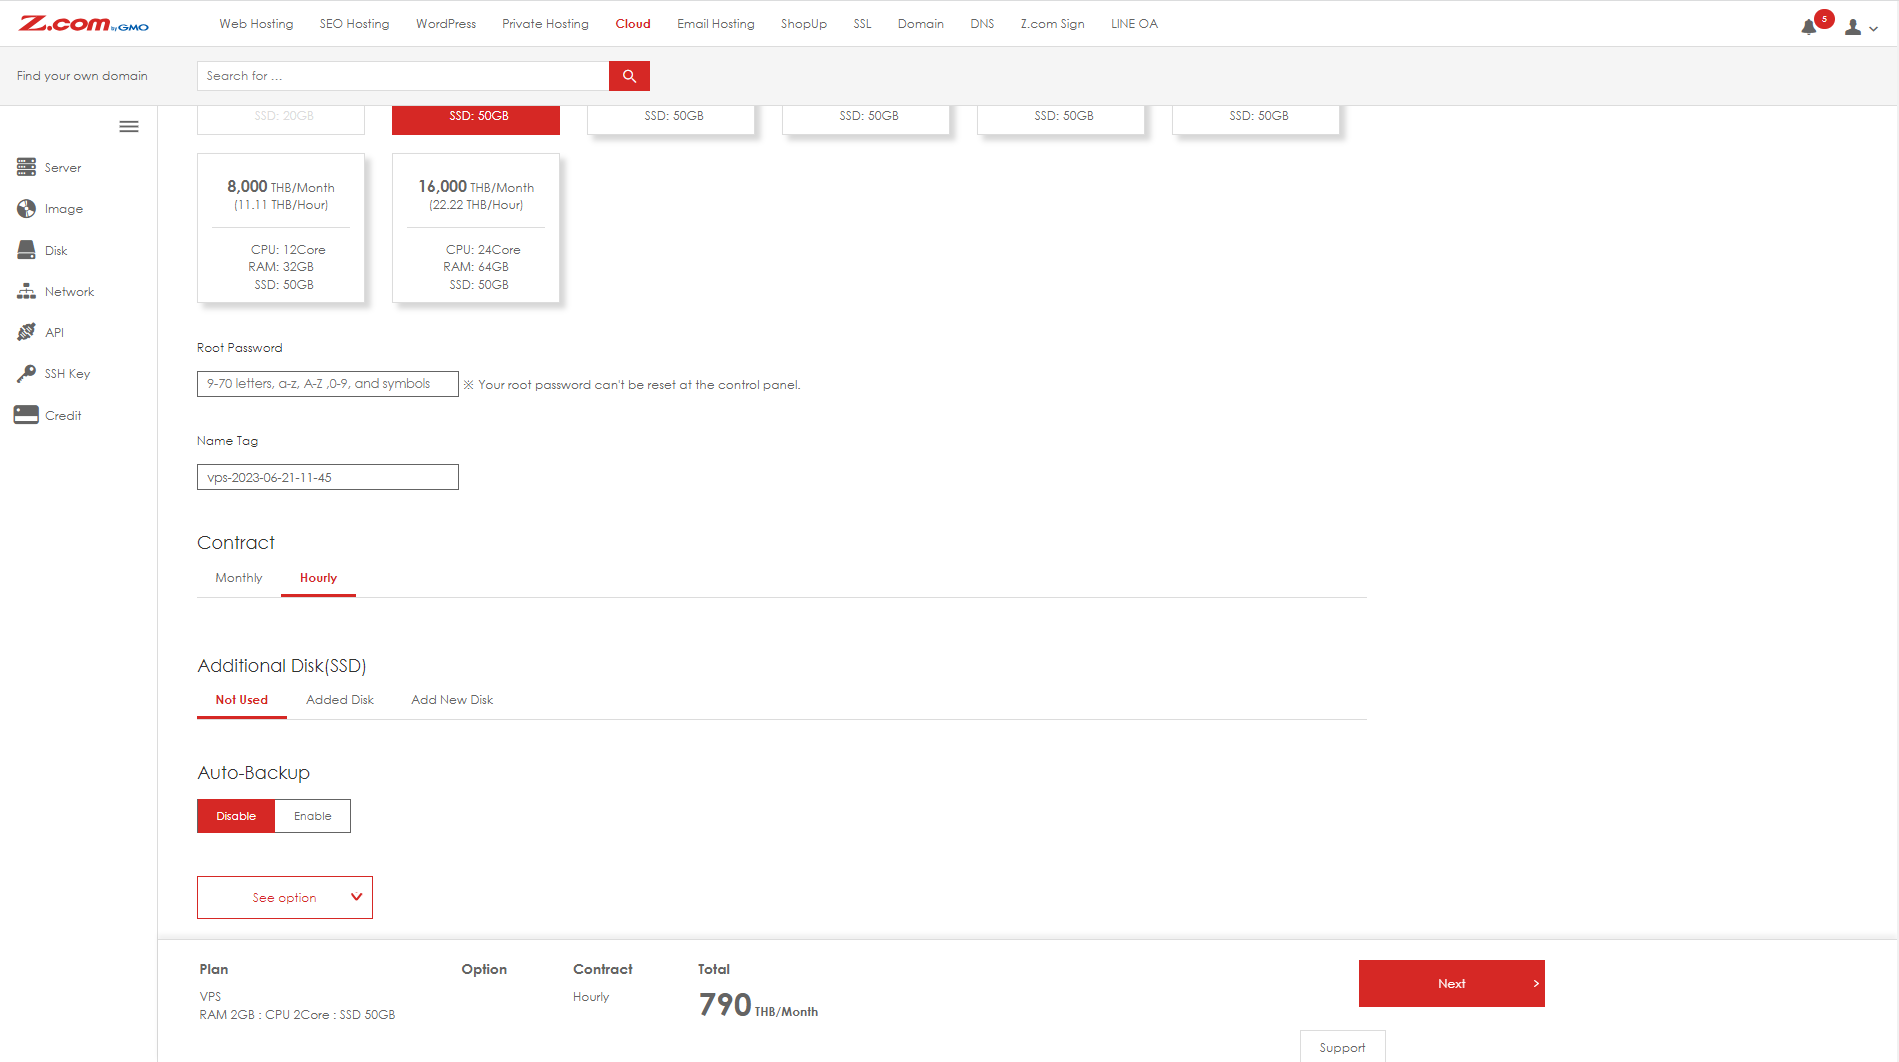
3.3
Input the login password for the new server into the "Root Password" section and an alias or hostname for the server into the "Name Tag"
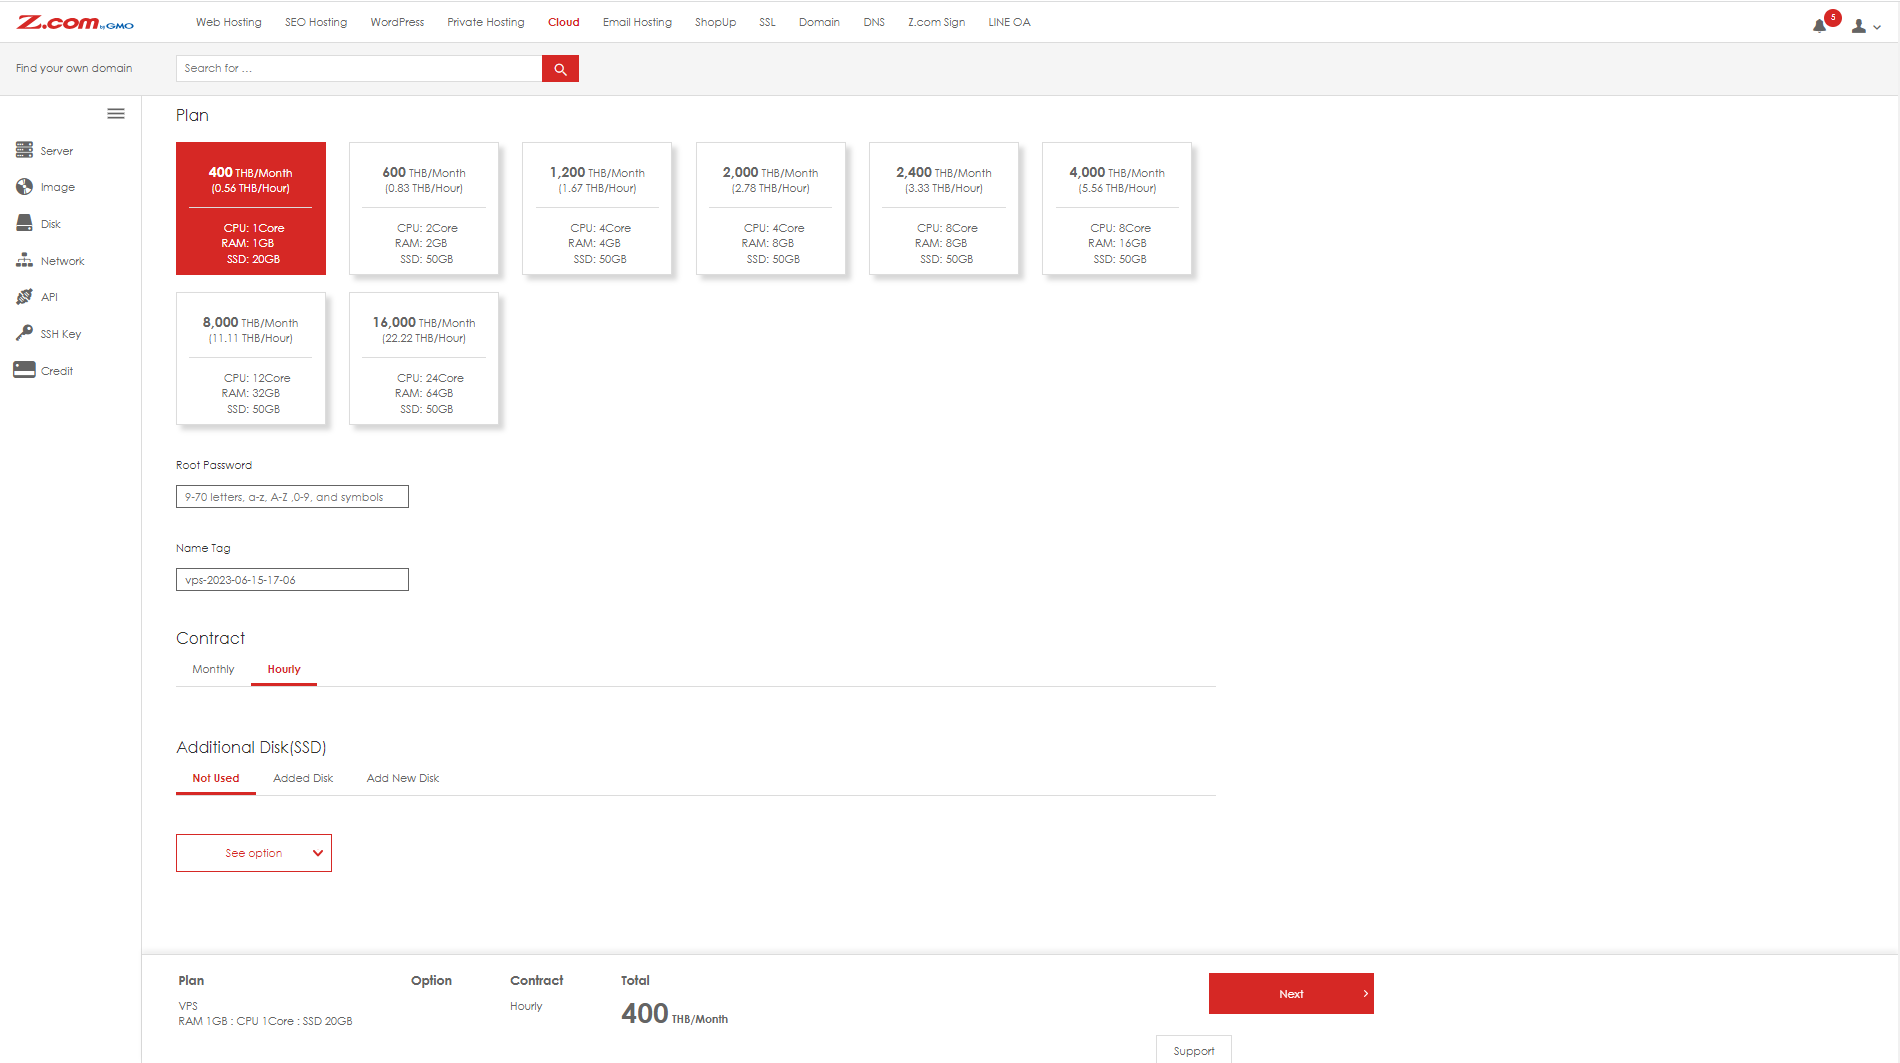
Choose your preference for the usage contract to be either "hourly" or "monthly"
For "hourly" contract, the usage fee will be deducted from the top up credit automatically everyday
For "monthly" contract, the full amount of the usage fee for the committed period will be charged in advance with the discounted price applied.
Choose you preference for additional disk option and other additional free options within the "free option" section
Finally, click "Next" button to confirm your purchase
4
Start using
4.1
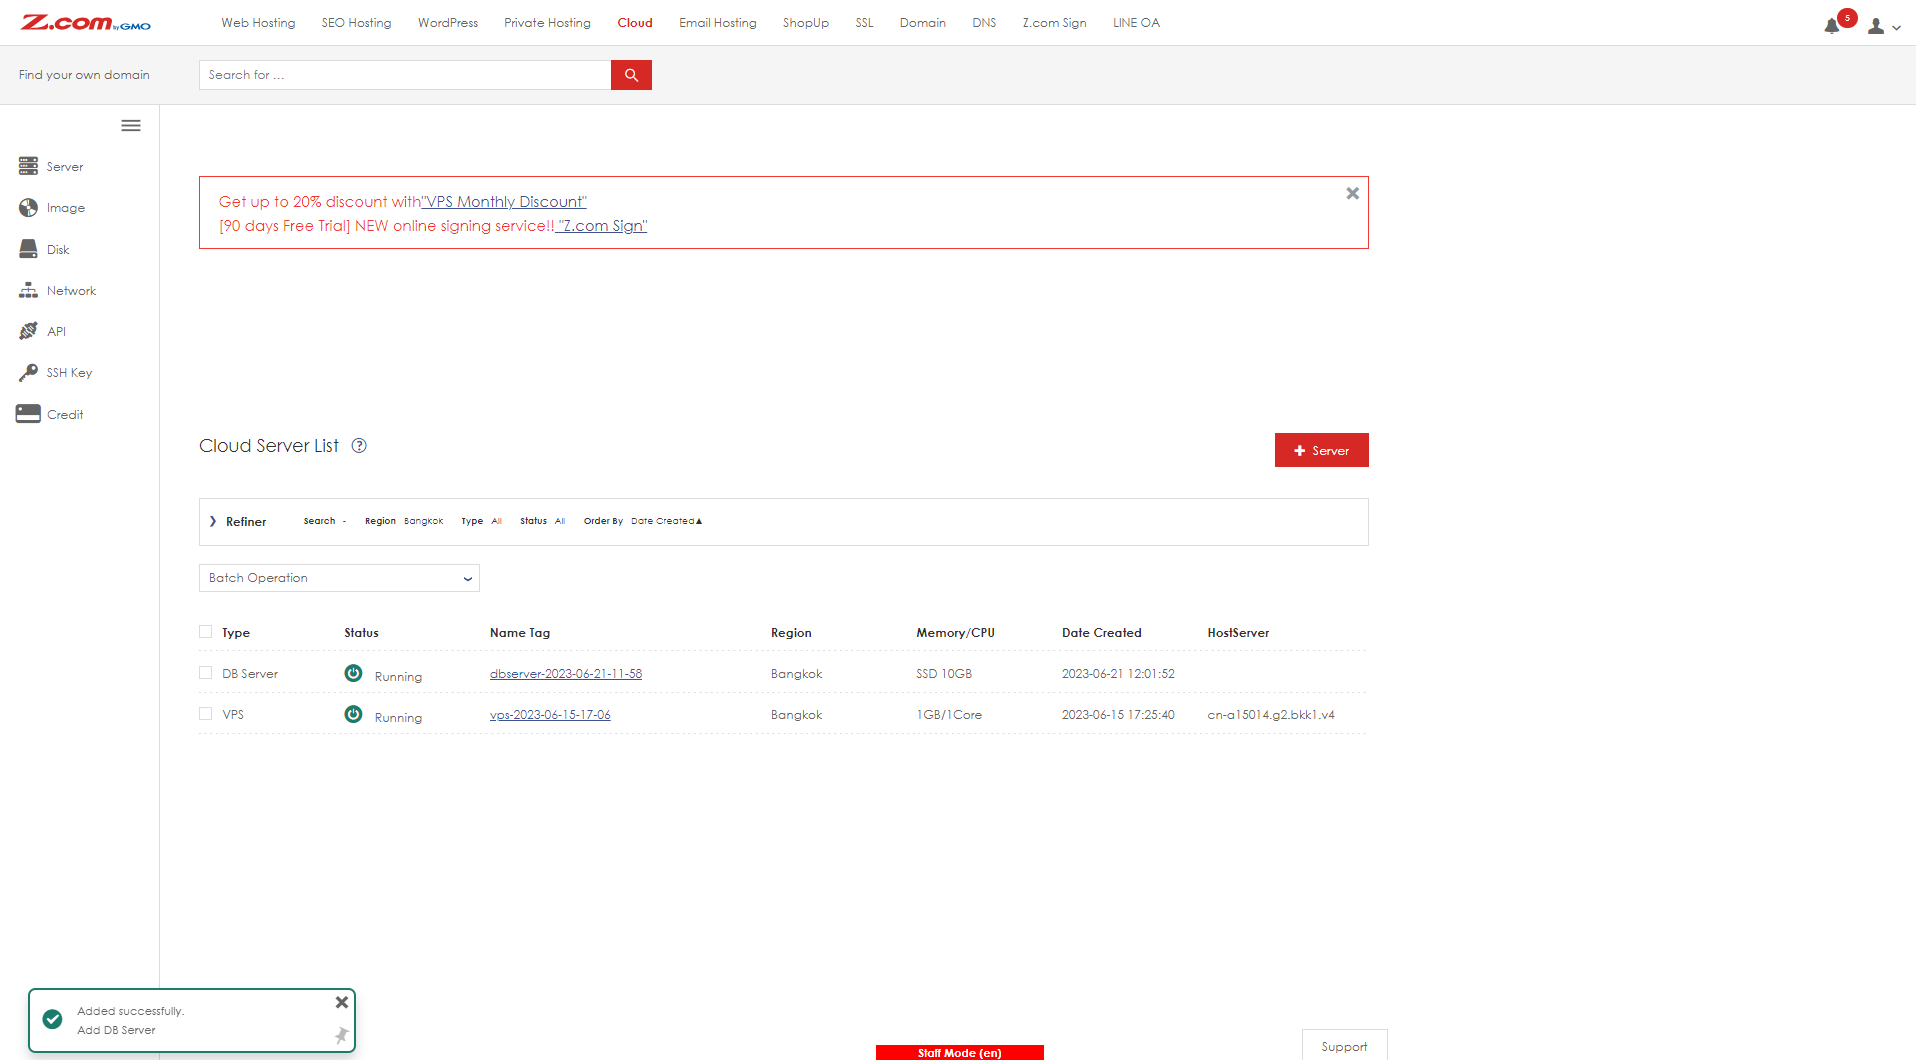
After the purchase, there will be a new server shown in the "Cloud Server List" in the "Cloud" product page. Click on the "Name Tag" of the server to go into the page for the server details.

4.2
You can get the IP address for the server in the "Network Information" section to use it for login process
**All network info recessary can be checked here whenever needed and you can change the security policy too under the "Port Permission" to allow only specific ports for higher security
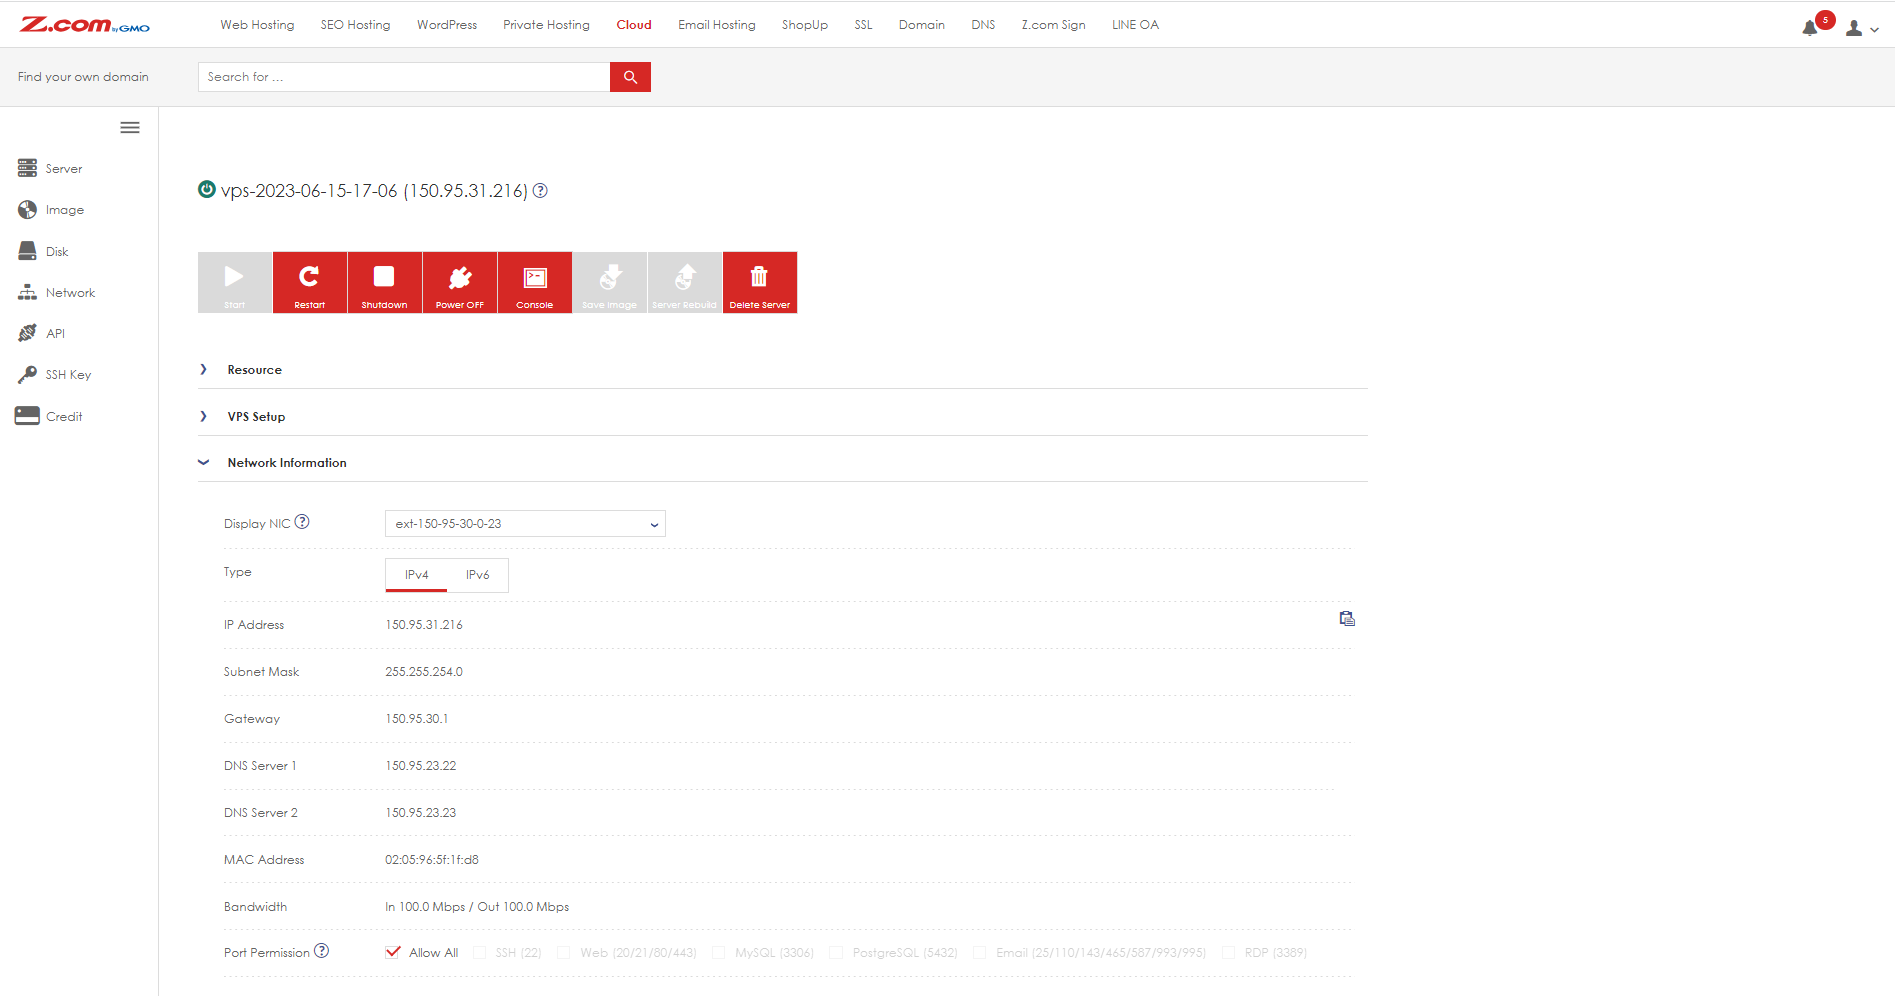
4.3
The icons on top of the page is used for remote management of the server.
Start button: power on the server when its off
Restart button: to reboot the server (similar to force restarting a PC with power button)
Shutdown button: to power off the server (similar to power off a PC wtih power button)
Console button: to launch a remote console in case of remote login is not functional
Save image button: to manual save a snapshot of the server as backup. (can be used only if the server is power off)
You can expand the "Resource" section to check the current resource usage of the server
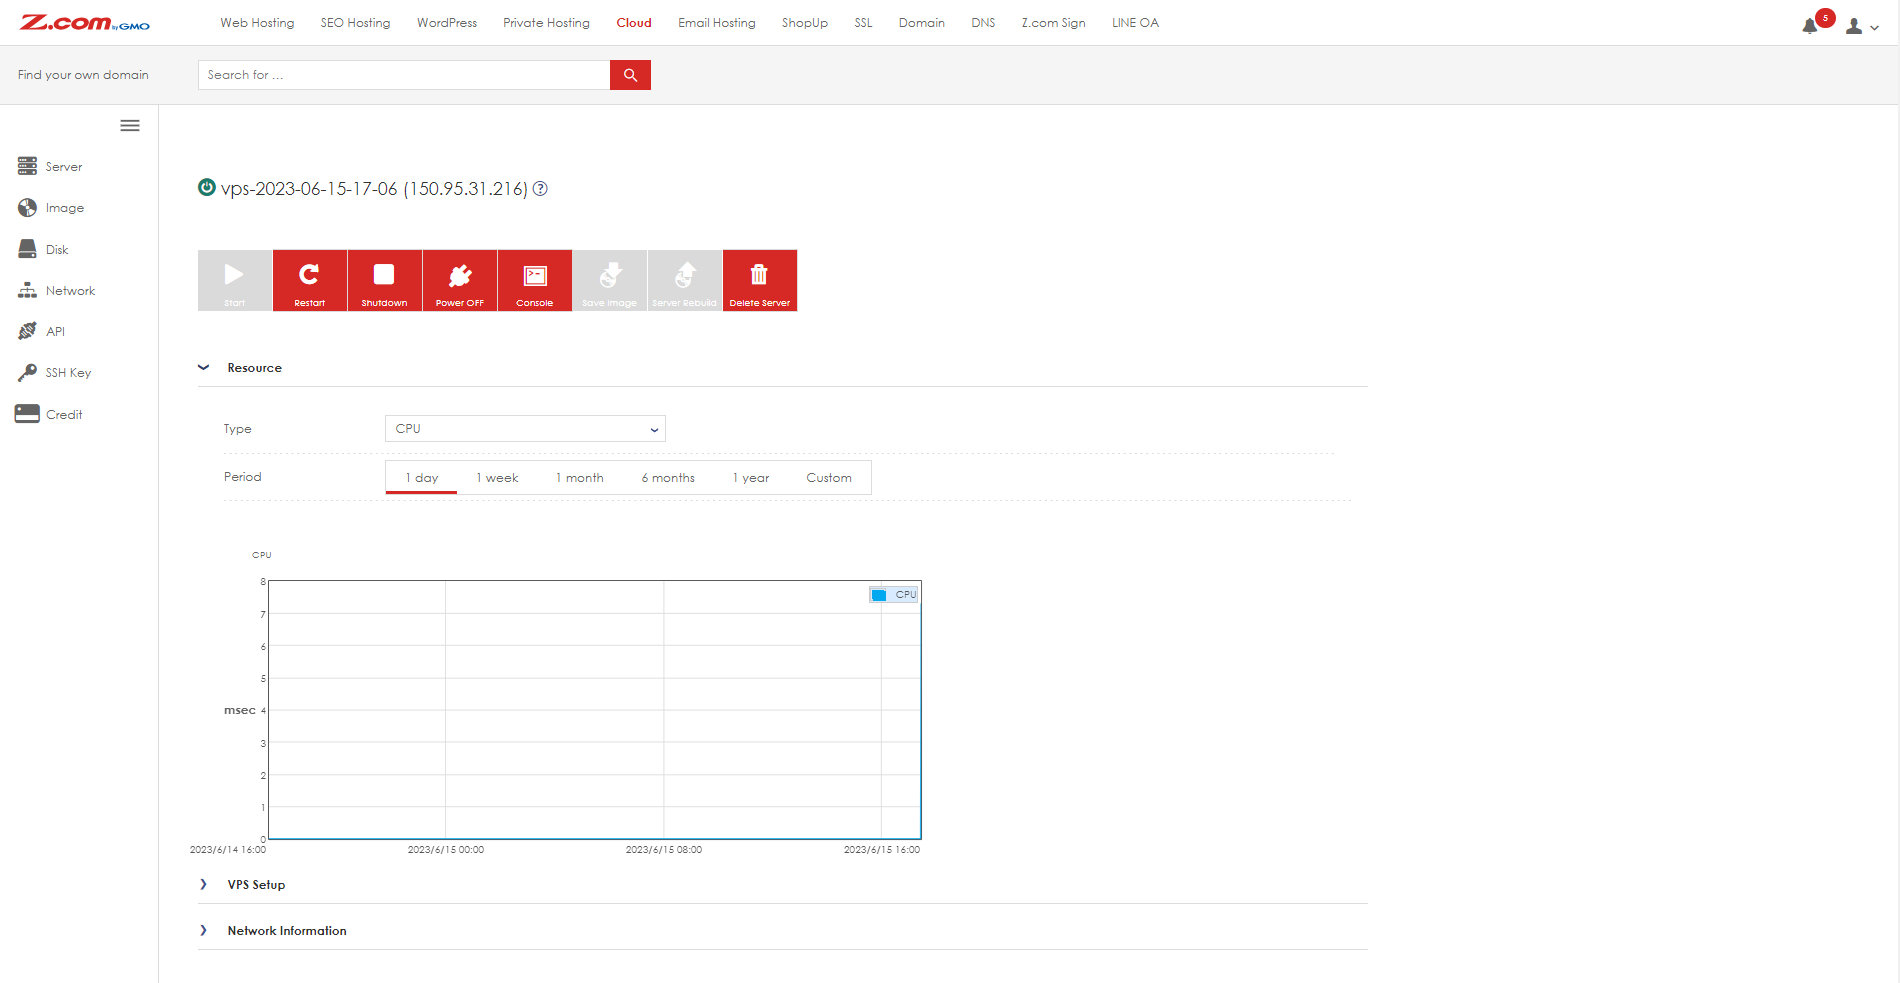
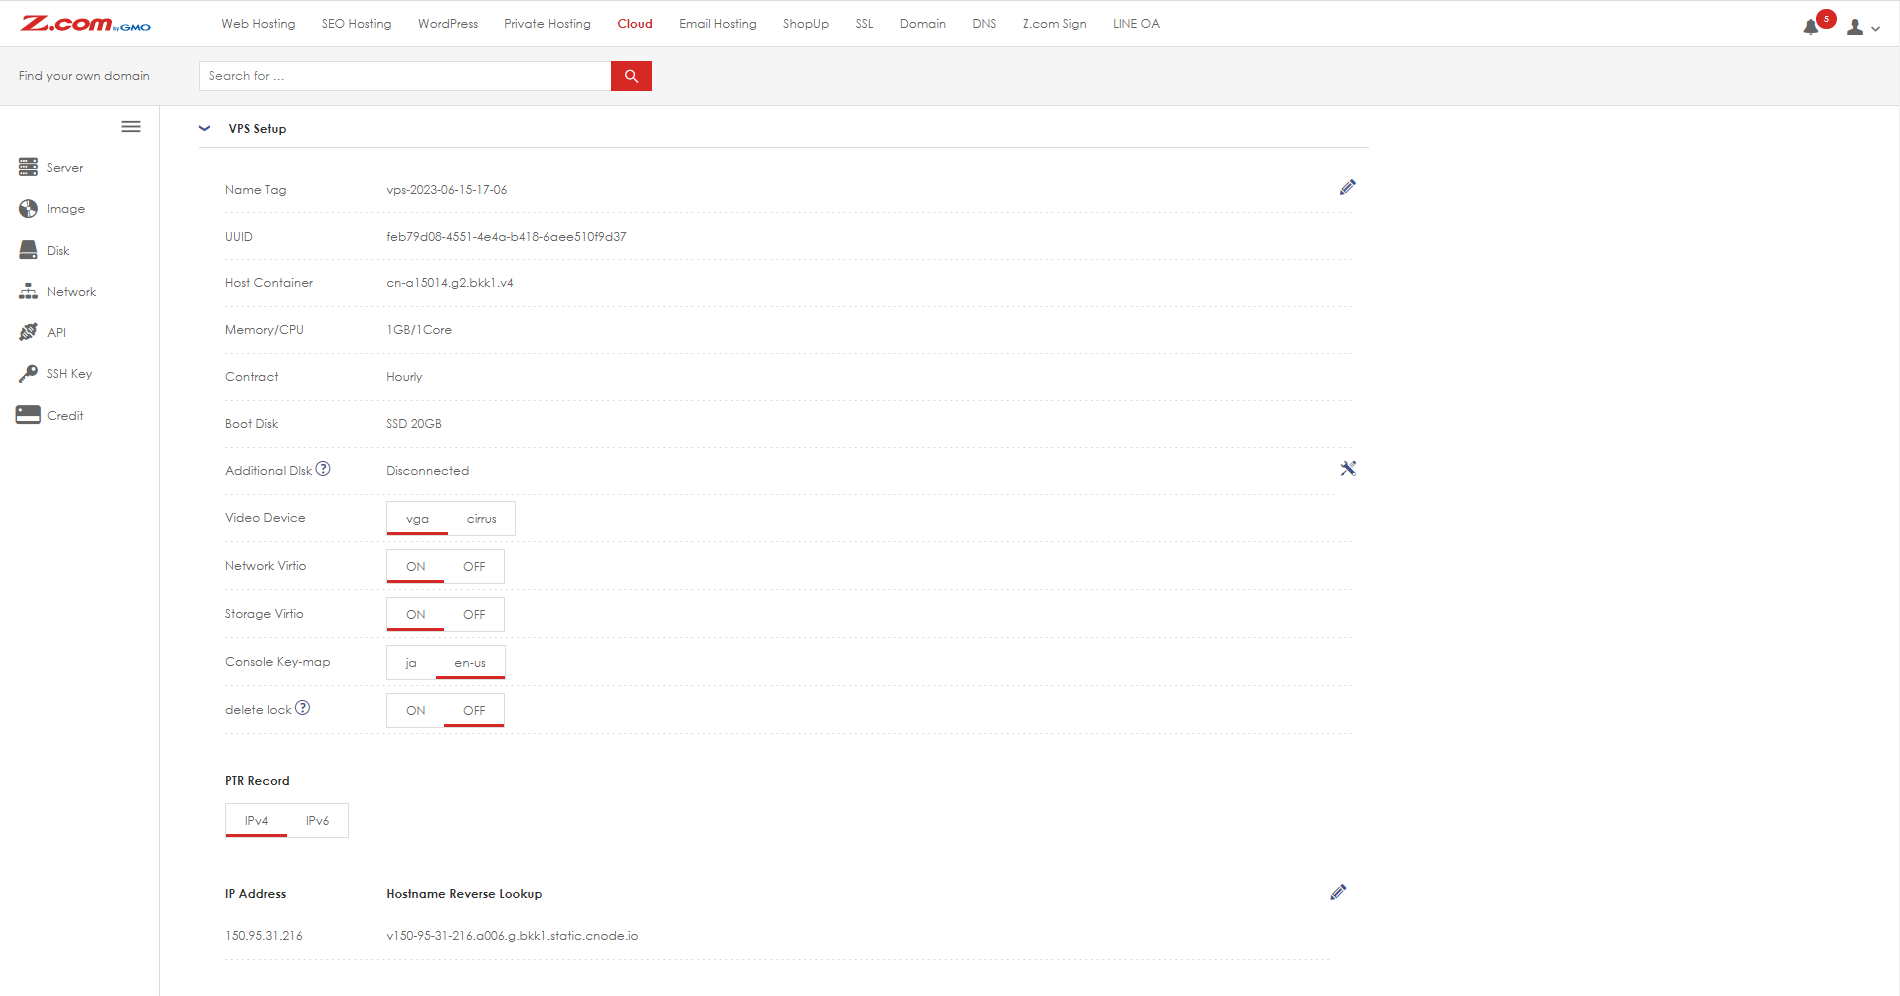
4.4
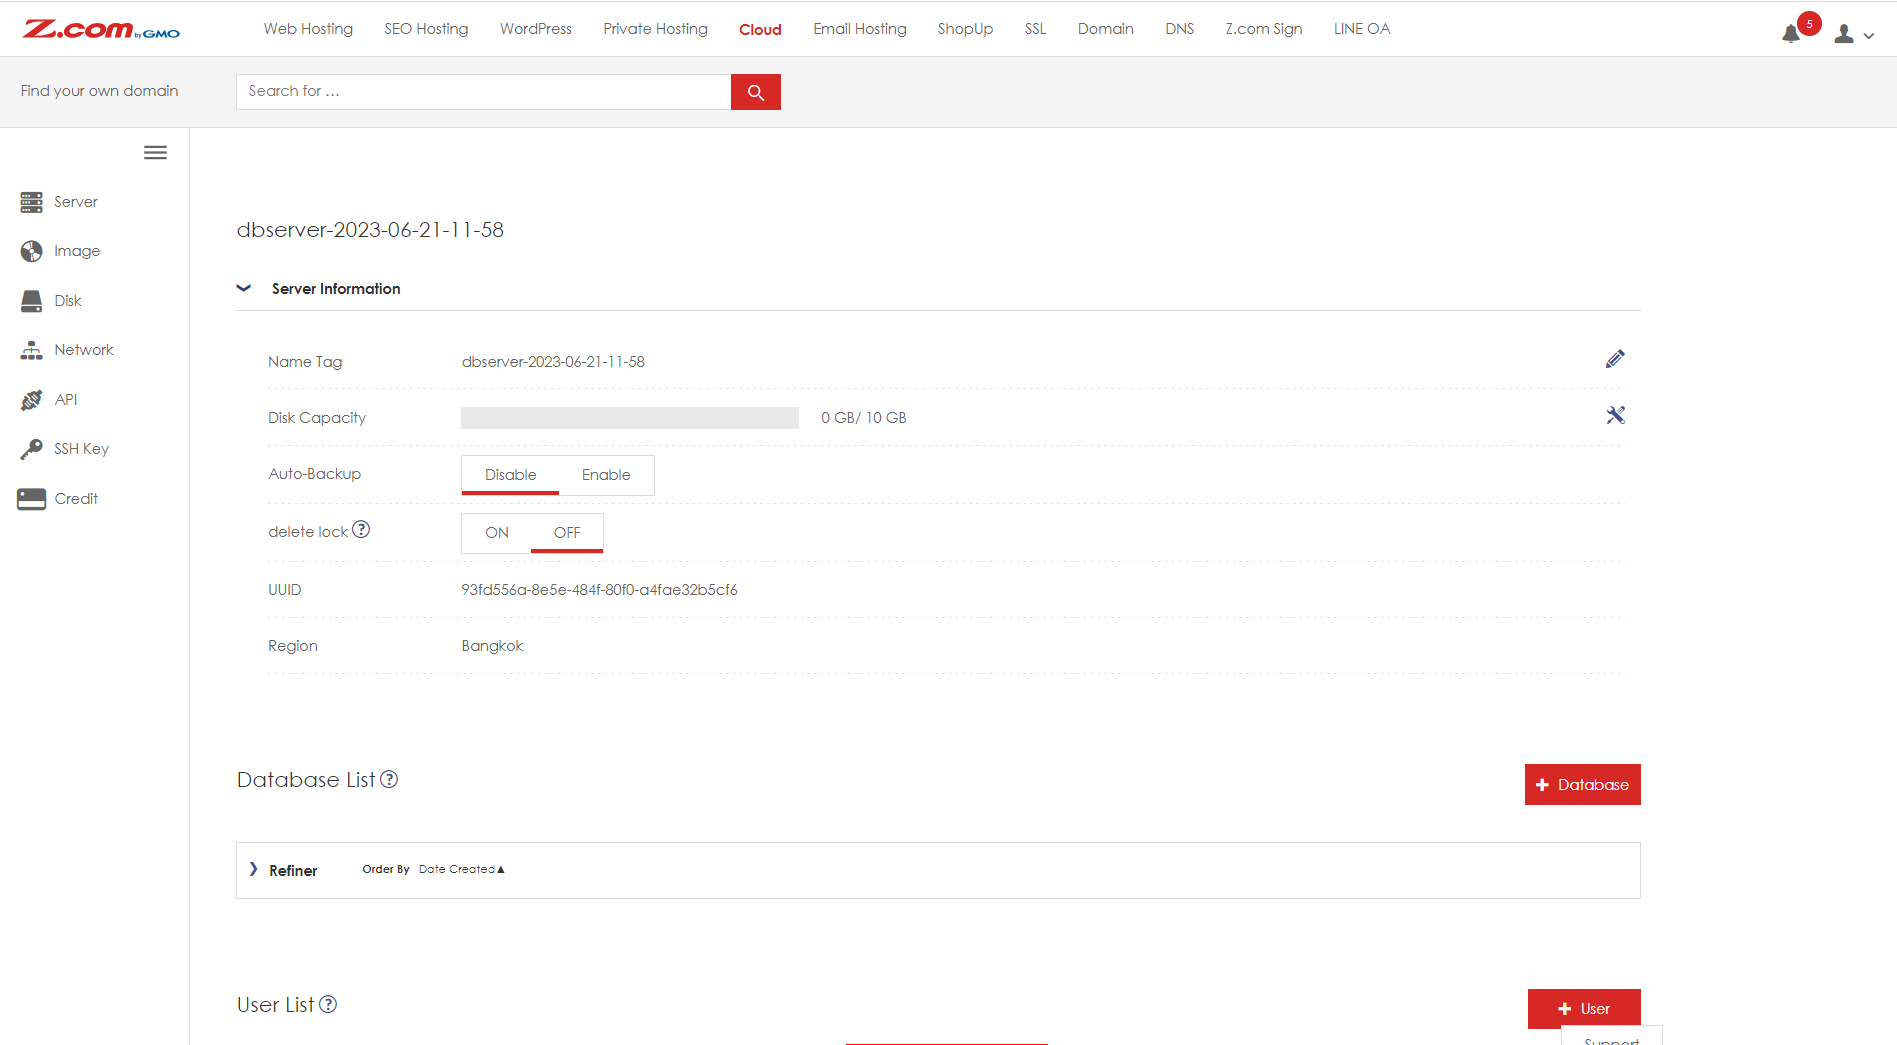
To change any spedification for the server, expand the "VPS setup" section
Name Tag: change the server alias hostname
Memory/CPU: change the server plan
Additional Disk: add new or change the spec of the additional disk
Auto-Backup: turn on/off for the auto-backup feature of the server (1 copy of server snapshot executed 3 times within a week)
End of procedures